
Adding your first client
A client in Say Less Office is a private space for one business or brand you're managing. Each client gets their own portal, a page only you and that client can see, where they'll eventually review and approve posts.
Everything else in Say Less Office is scoped to a client - posts, calendars, approvals, all of it - so a client is the prerequisite for doing anything at all. Until you've added one, there's nothing to plan, nothing to draft, nothing to send.
How to add a new client?
There are three ways to start:
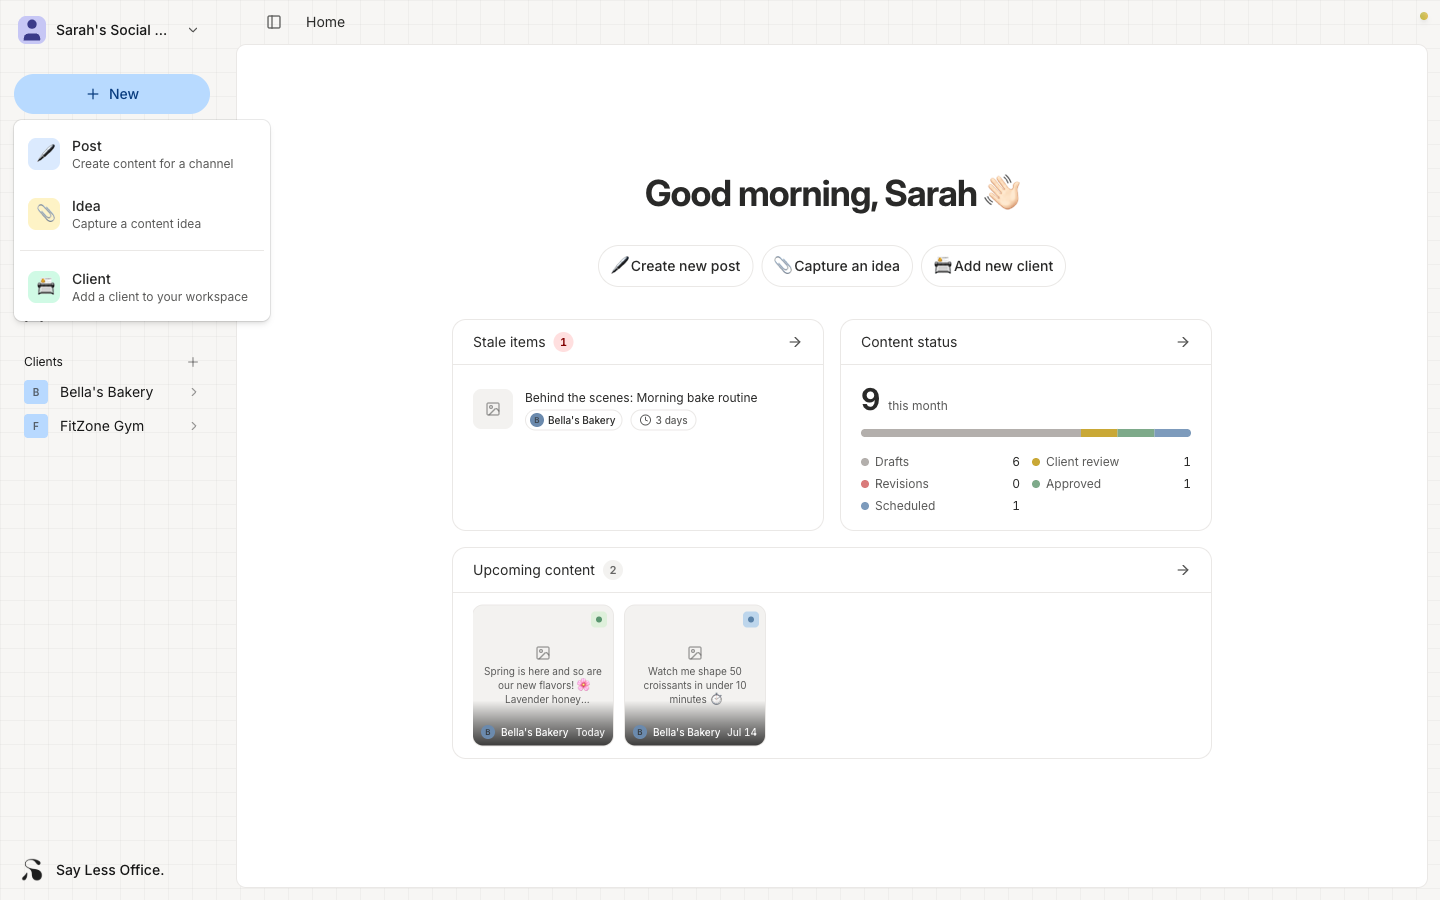
- Click the big New button in your sidebar, then pick Client from the dropdown.
- On the Home page, click the Add new client chip.
- In the sidebar, click the small + icon next to the Clients heading.
All three open the same three-step dialog.
Step 1: Add a new client
The first step covers the client's identity in your workspace.
- Logo: optional. Upload one and it shows up in the client's portal header and in the client list in your sidebar.
- Client name: required. Use the business name (e.g. "Bella's Bakery"). This is what your client will see when they land in their portal.
- Timezone: used when you set schedule dates on their posts.
- Portal link: auto-generated from the client's name (e.g.
saylessoffice.com/portal/bellas-bakery). You can customize the slug if you want something shorter or the default is already taken by another client.
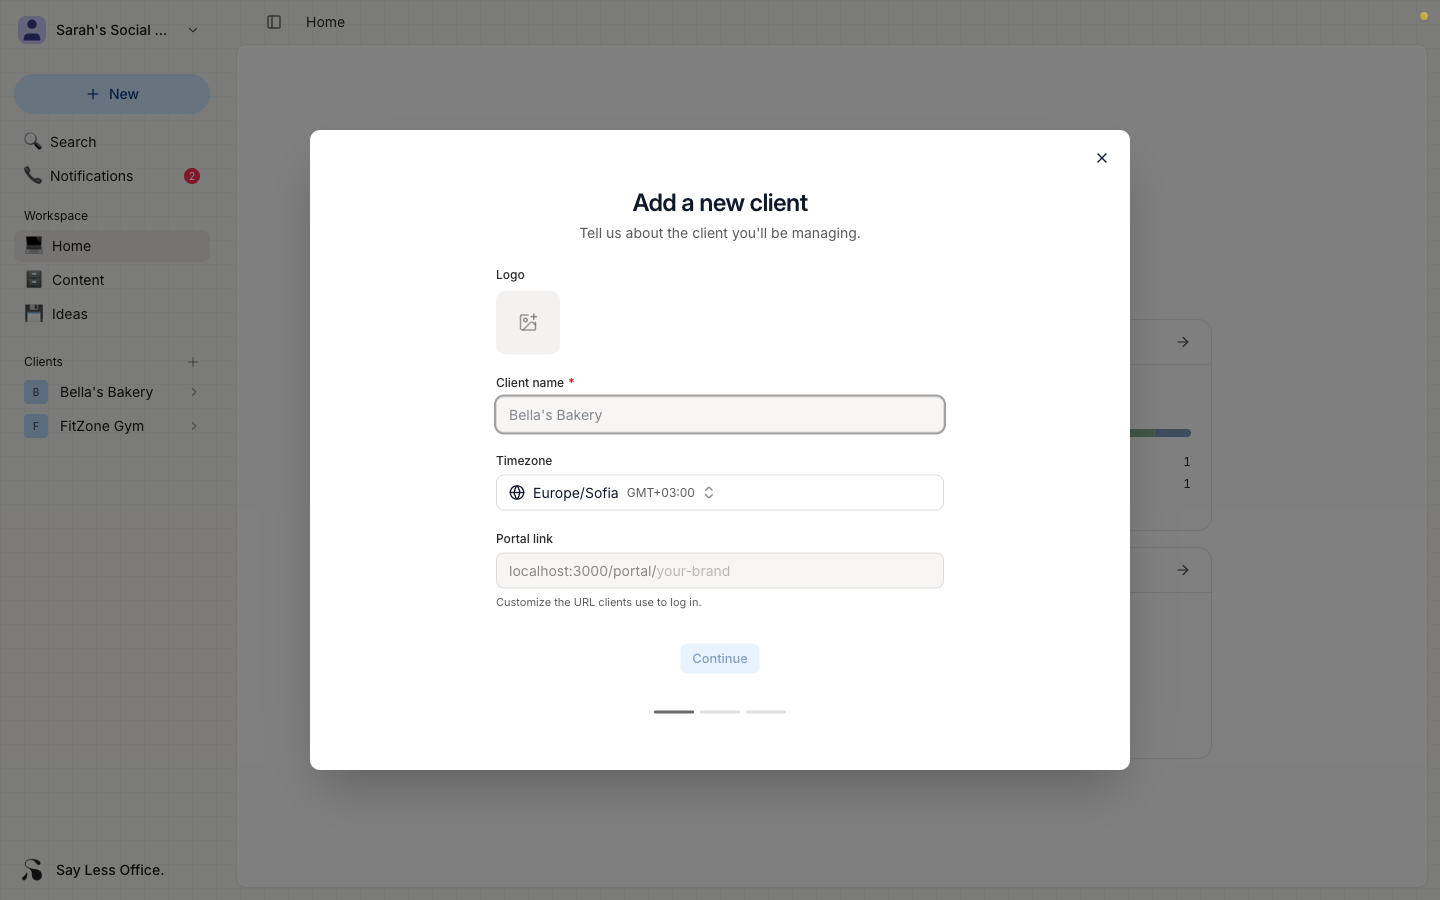
Click Continue to go to step 2.
Step 2: Contact info
This is the person on the client side you'll be working with.
- Name: the contact person's name.
- Login email: where they'll sign in to the portal. Adding an email here creates their account.
- Email them a portal invite now: a checkbox that appears once name and a valid email are filled in. Check it and Say Less Office sends them a sign-in link as soon as you finish creating the client.
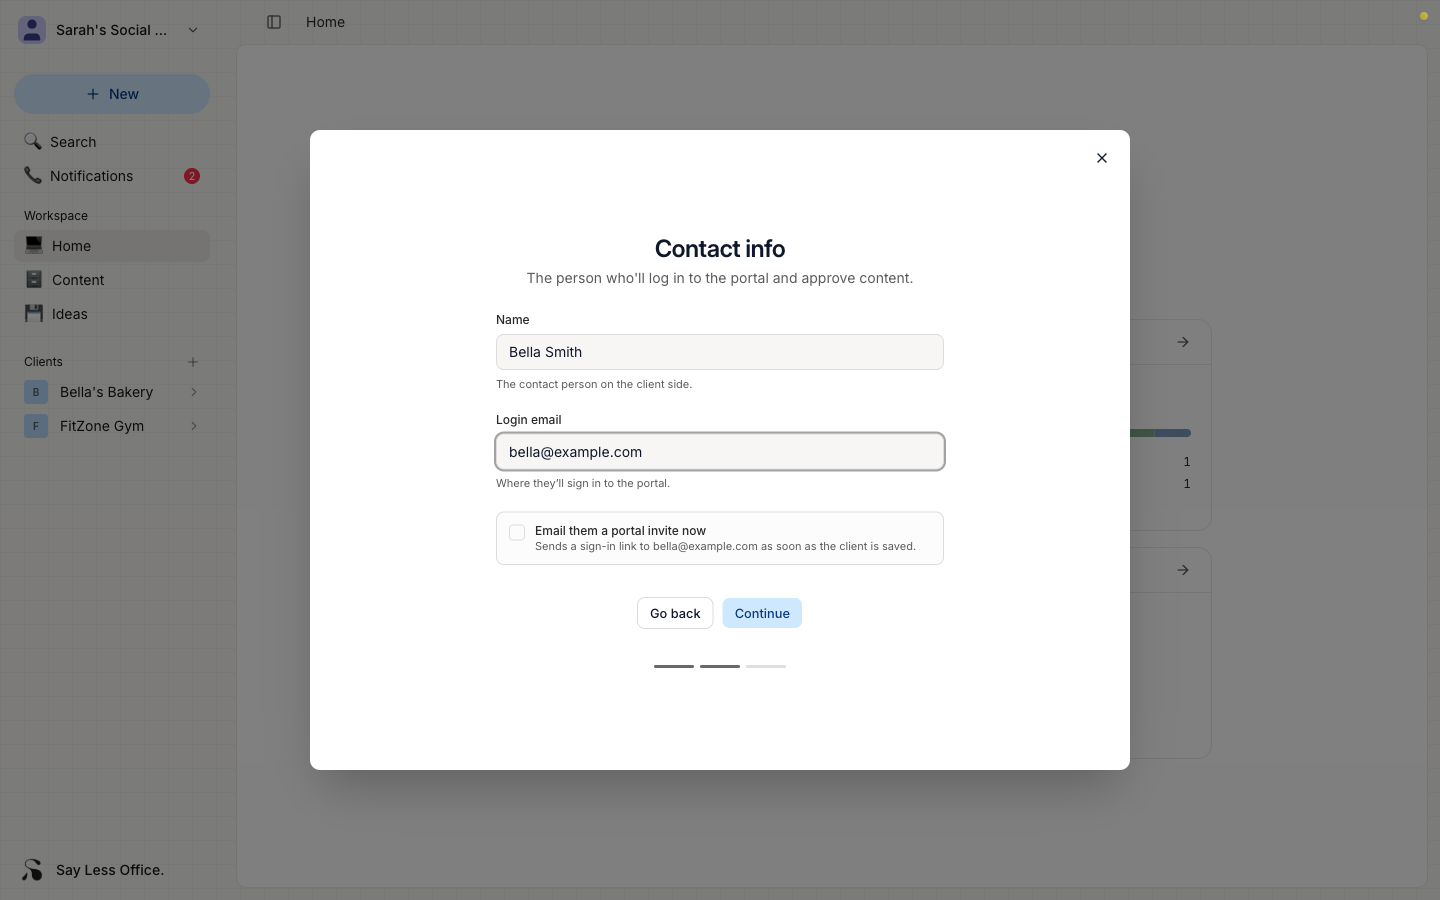
Click Continue.
Step 3: Social accounts
Add the social media accounts you'll manage for this client. Each account has:
- Platform: Instagram, TikTok, and so on.
- Handle: the
@handleon that platform. - Display name: optional, a longer human-friendly name for the account. Falls back to the handle everywhere else, so you can leave it blank if the handle already reads well.
You can skip this entirely and add channels later from the client's settings.
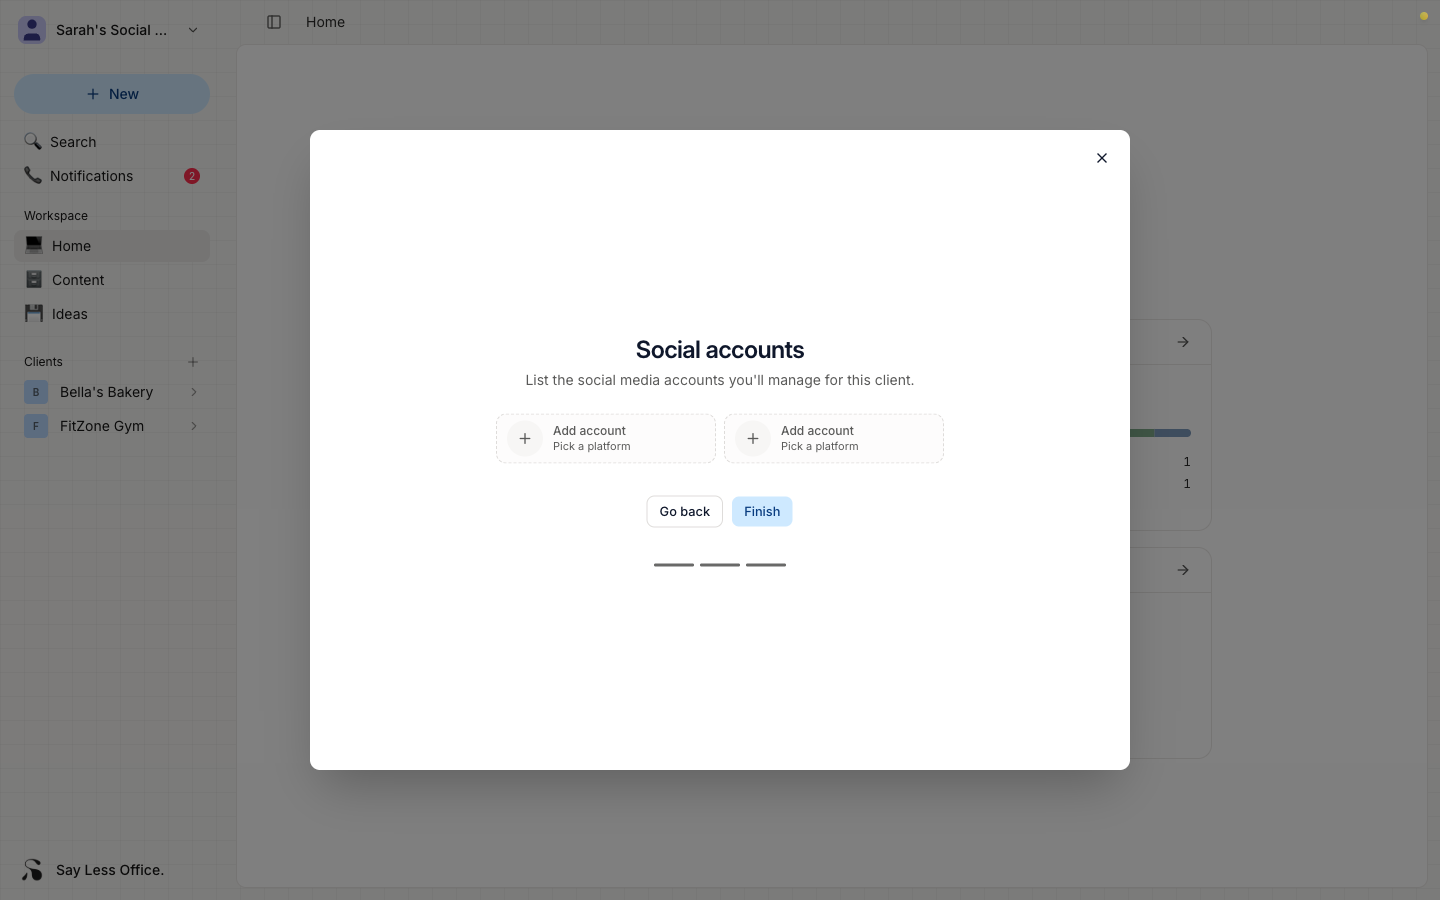
Click Finish to save the client.
What happens after you save
- Your new client appears in your sidebar under Clients.
- If you checked "Email them a portal invite now", an invite email is on its way to the login email.
- If you didn't check the box, no email goes out - but the login email you added in step 2 is remembered. Whenever you share the portal URL with your client, they enter that same email on the sign-in screen and get a magic link. Nothing extra to set up.