
Getting around the Content page
The Content page is where you spend most of your time. It's a single page with three ways to look at the same content, plus a few tools to help you get around: an unscheduled tray, batch actions, and filters.
The three ways to view your content
At the top of the content page there's a view switcher with three options:
- Calendar - a month grid with each day showing the posts scheduled for it. Best for planning the shape of a week or month.
- List - a flat, dense list of every post, grouped by date. Best for churning through drafts or looking for a specific post.
- Grid - an Instagram-style 3-column preview of what the feed will look like once everything publishes. Best for double-checking the visual rhythm before you send things for approval. Only shows up if the client has an Instagram or TikTok account connected.
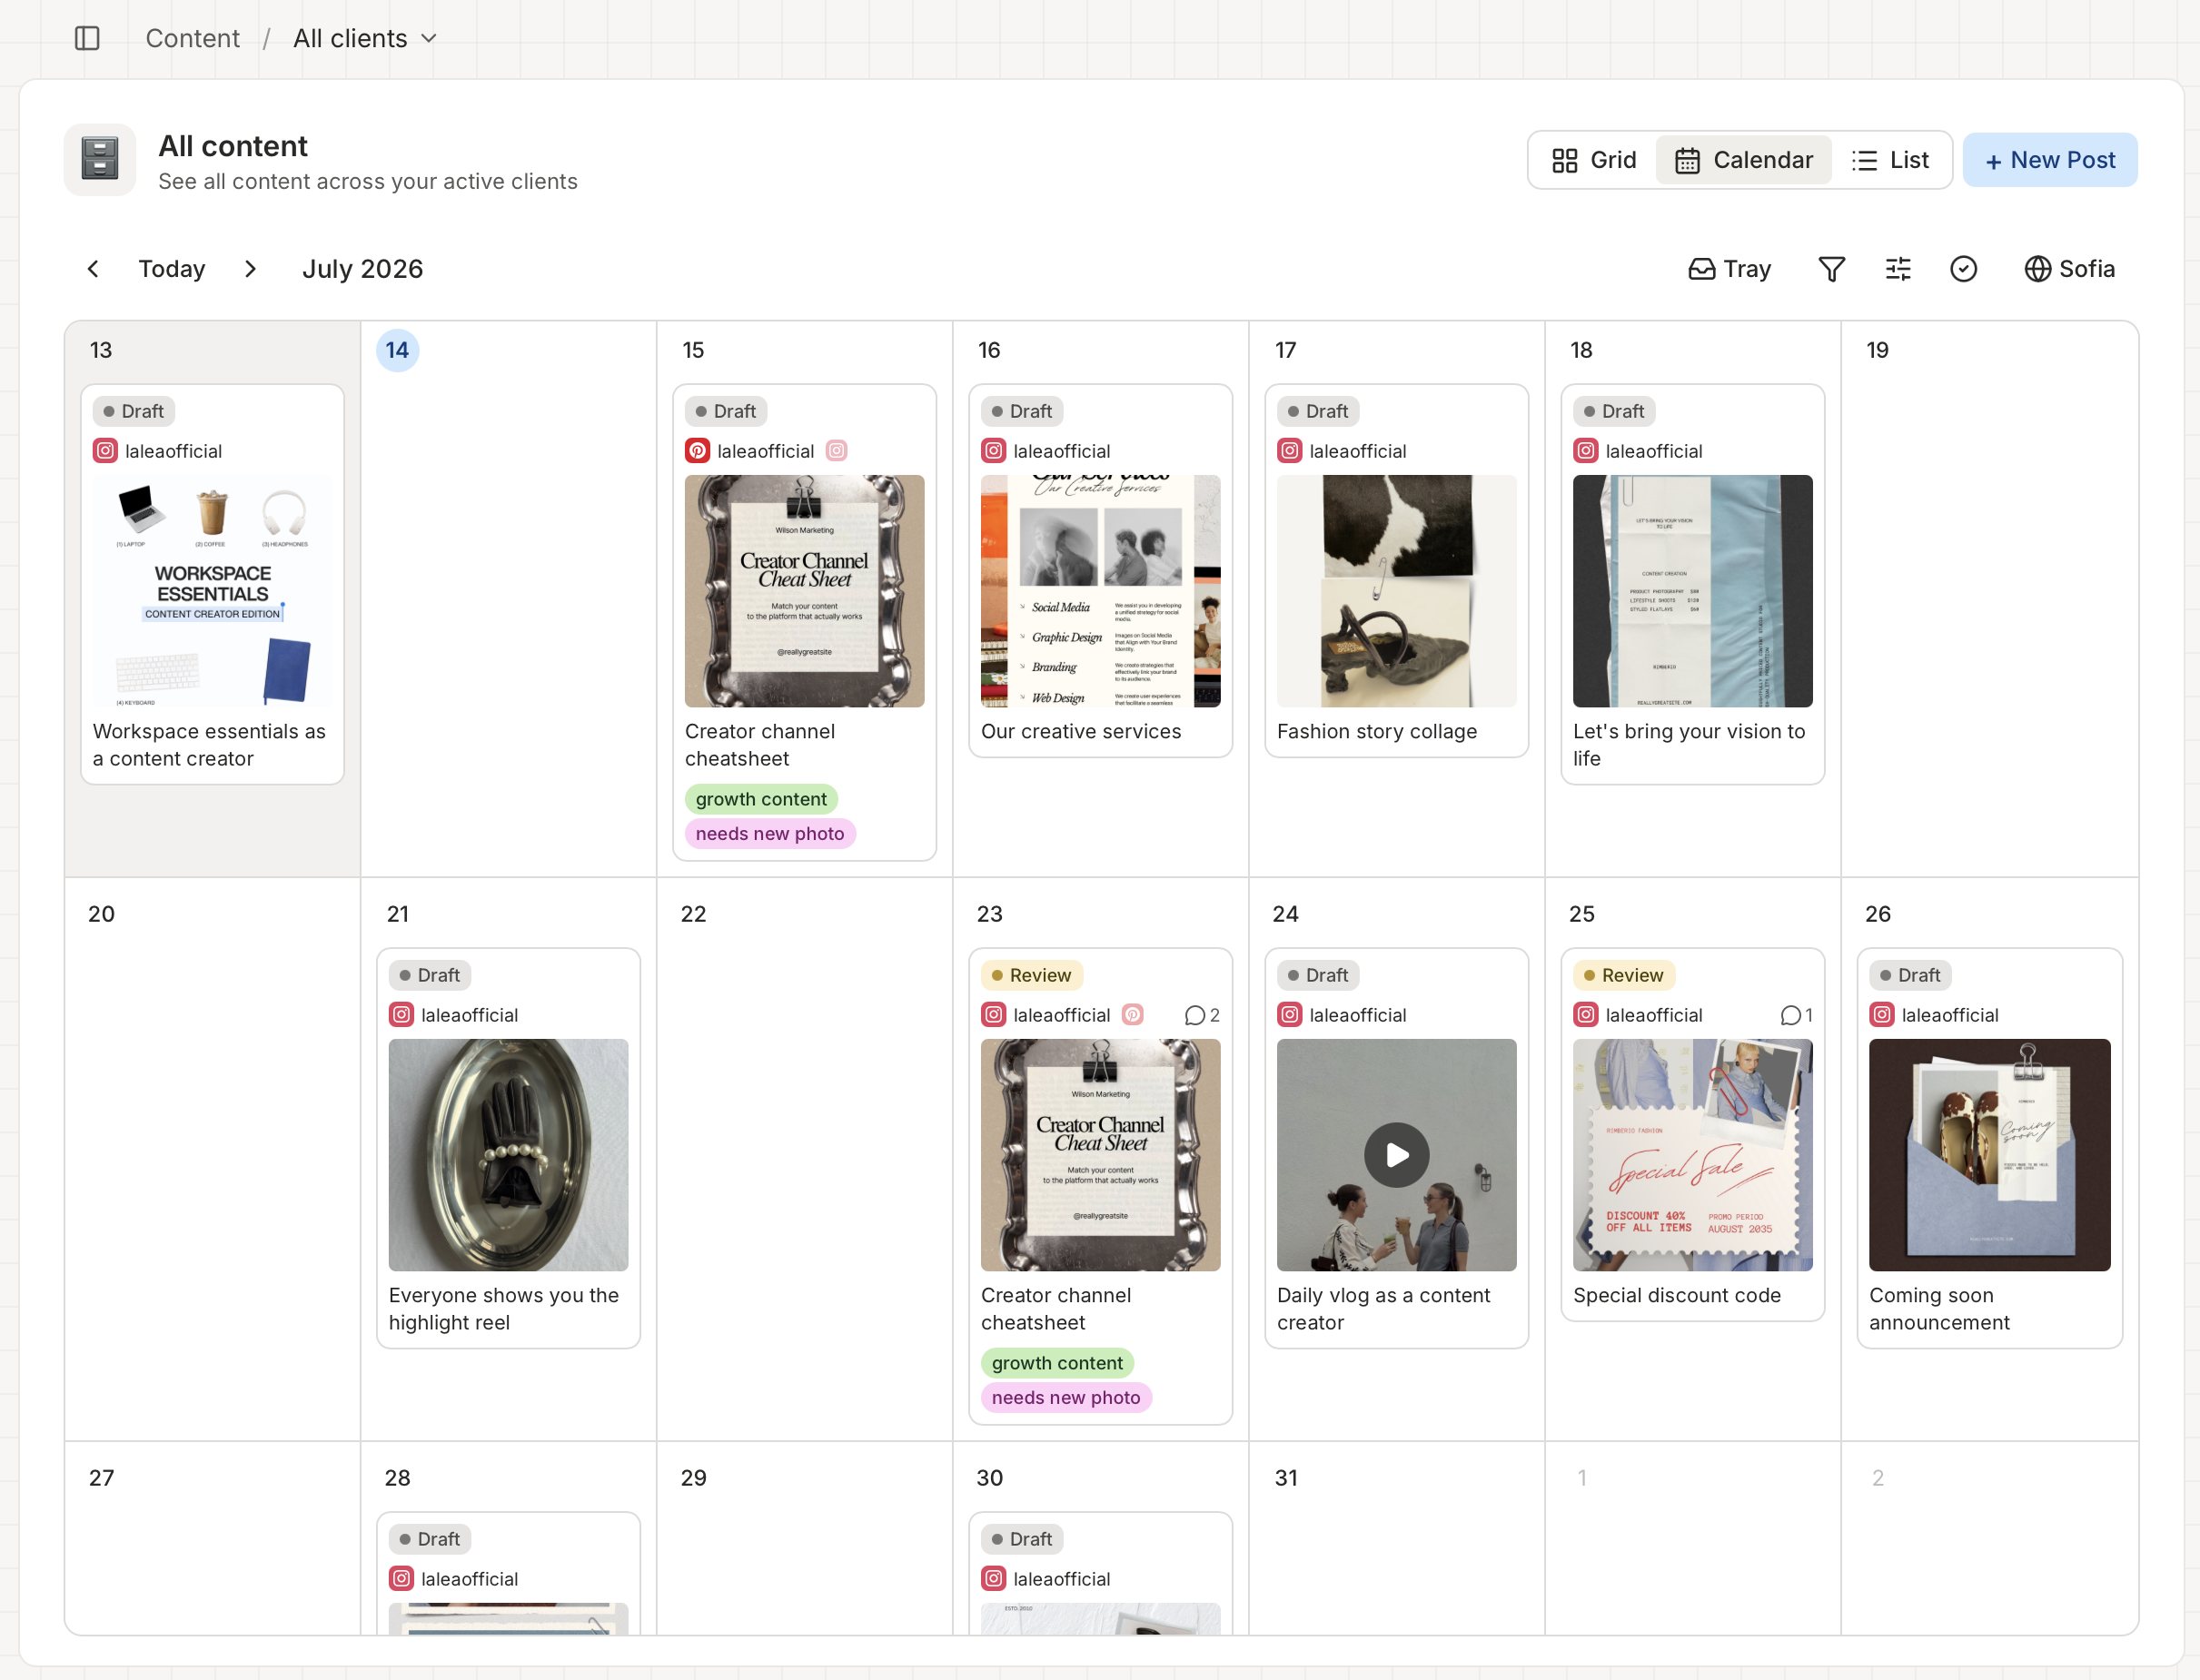
Switching views is instant and keeps your filters, so you can jump between them without losing your place.
Where posts without a date live
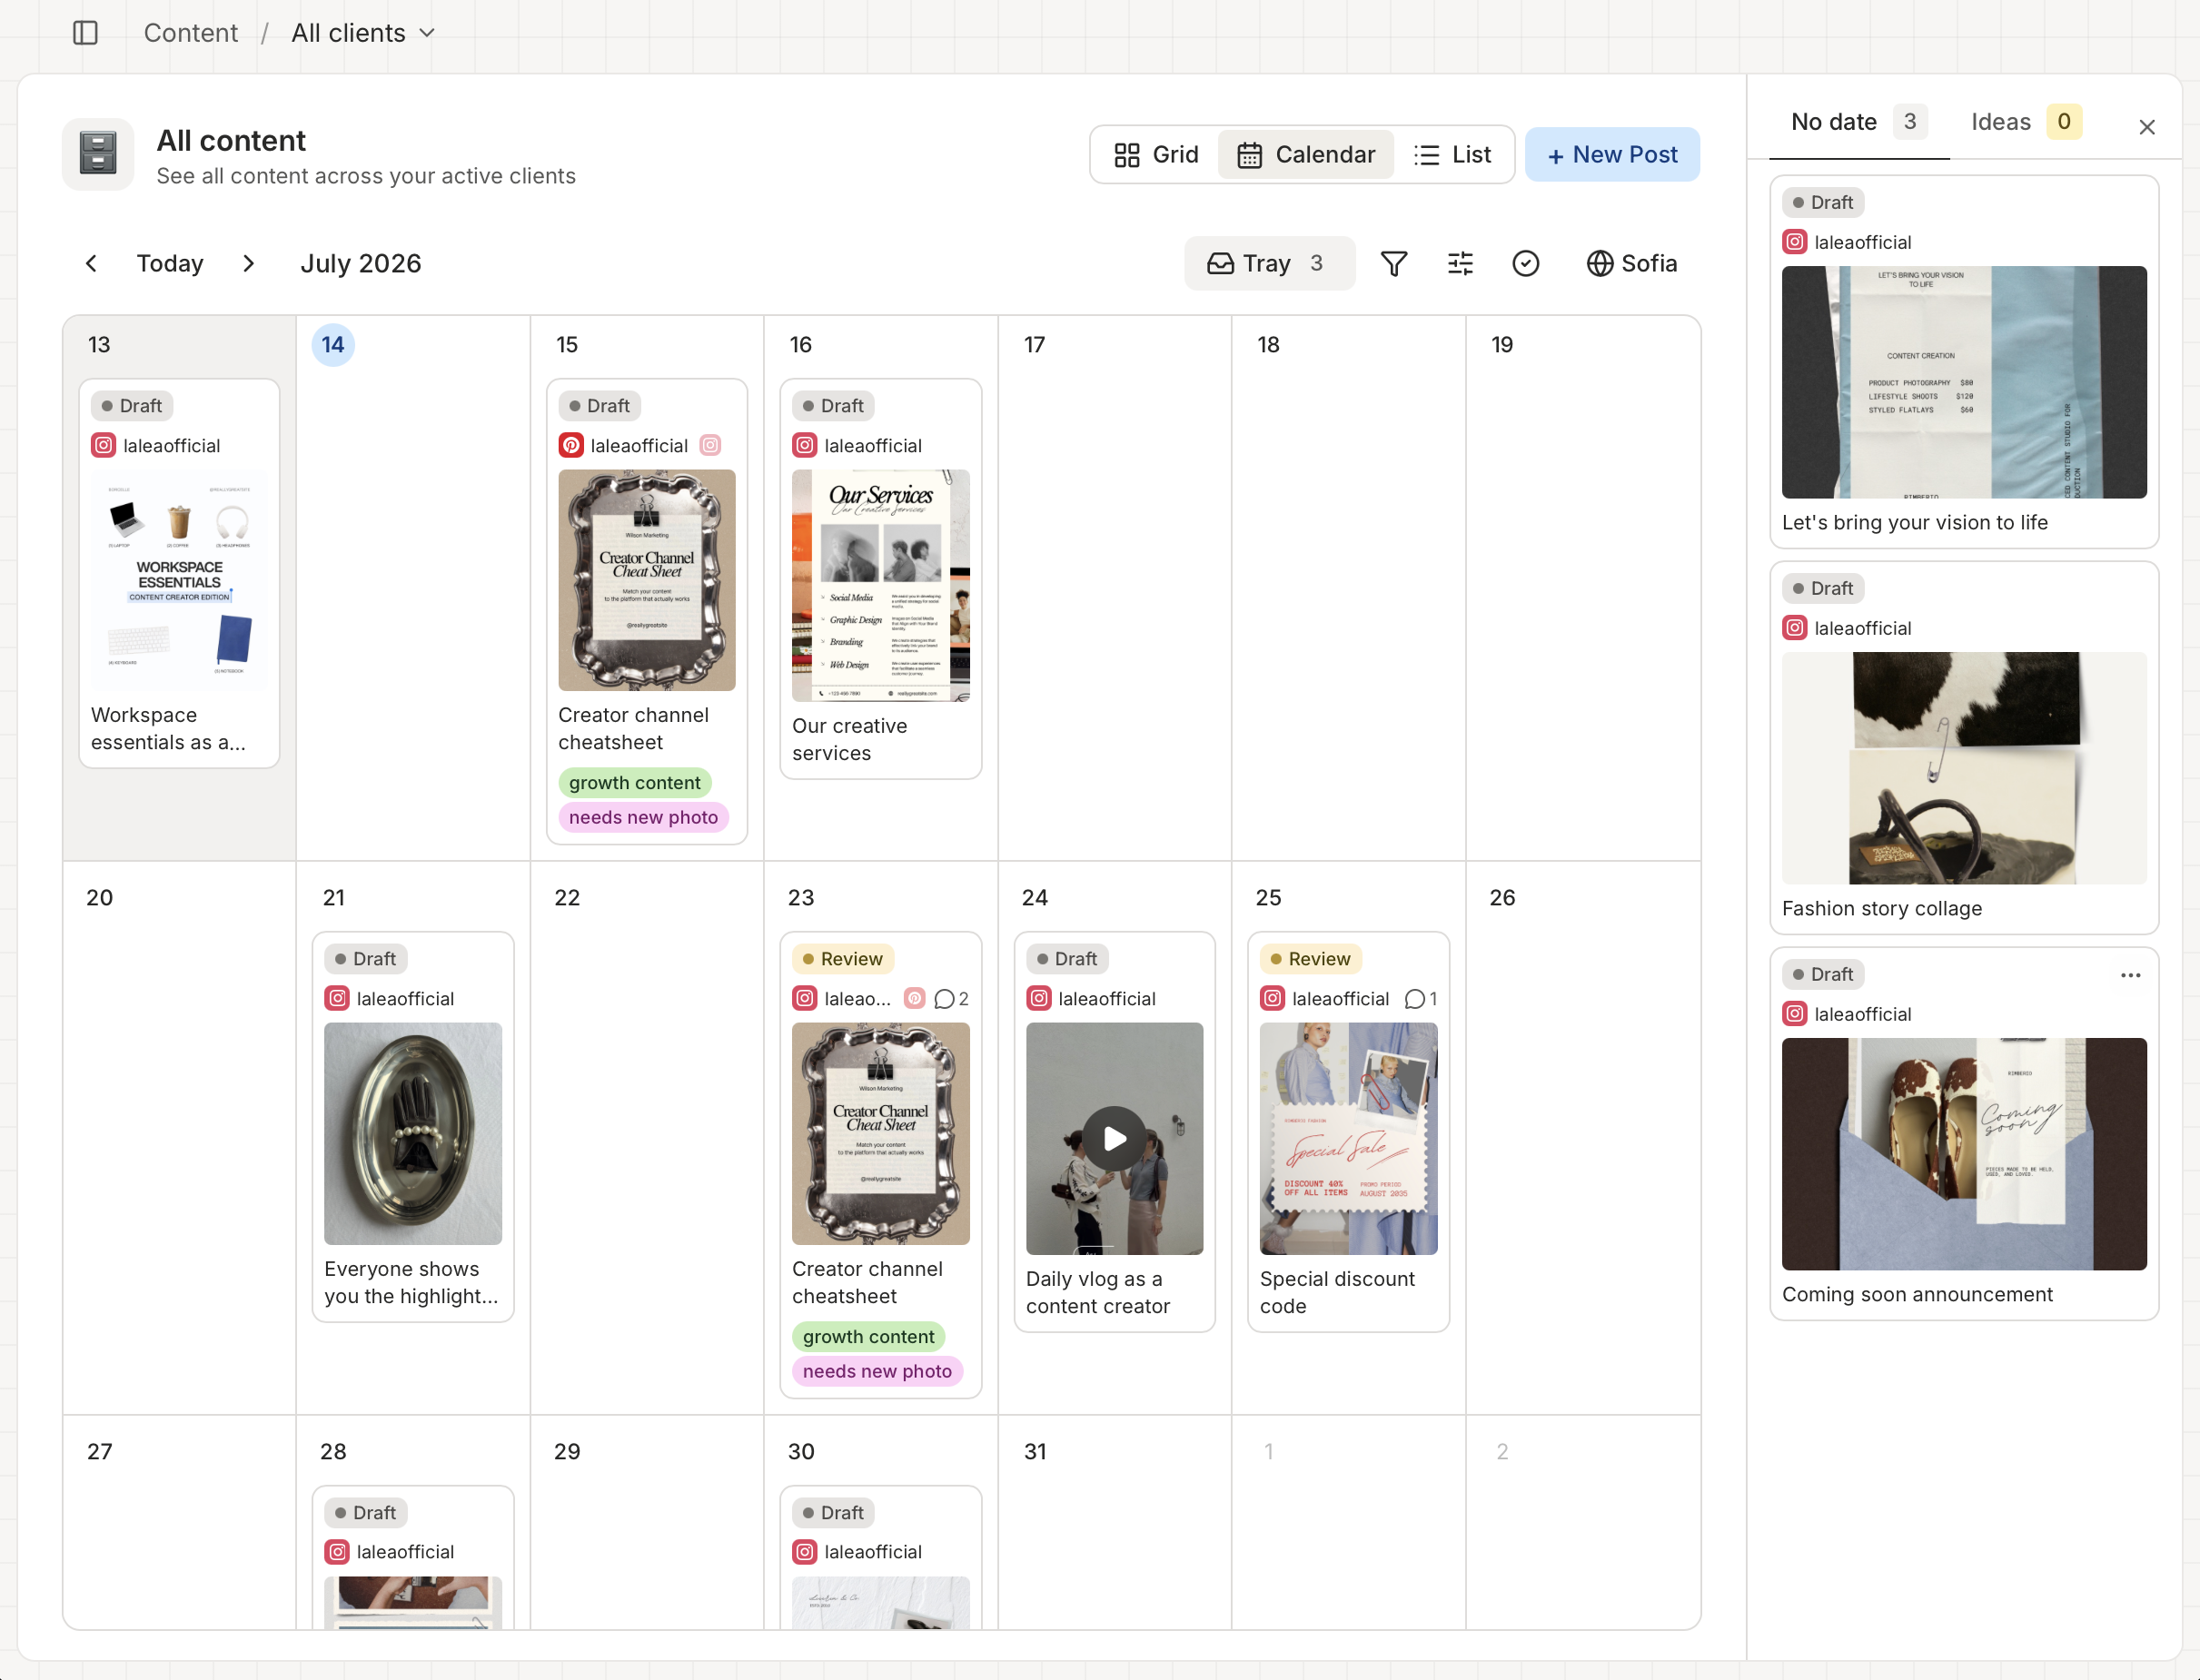
On the calendar view, there's a tray on the right of the page for posts that don't have a schedule date yet. Drafts you've captured for later, ideas that turned into posts but aren't scheduled yet, backlog items you're saving for the next campaign - they all live in the tray.
Two things to know:
- Drag posts in and out. Drag from the tray onto any day on the calendar to schedule it there. Drag from the calendar back into the tray to remove the date and park it.
- Toggle the tray closed using the tray icon at the top-right if you want the calendar to take the full width.
Applying an action to multiple posts at once
Sometimes you need to do the same thing to a bunch of posts (approve four drafts, delete last month's ideas, move a batch back to draft after a client scope change). The multi-select mode is for that.
- Click the Select posts icon in the toolbar. Every post card picks up a checkbox in its top-left corner.
- Click any post to select or deselect it. A pill at the bottom of the page shows how many are selected.
- From the pill, open Actions to run one of these on the whole selection:
- Move to draft
- Send for approval
- Approve
- Mark as published
- Delete (with confirmation)
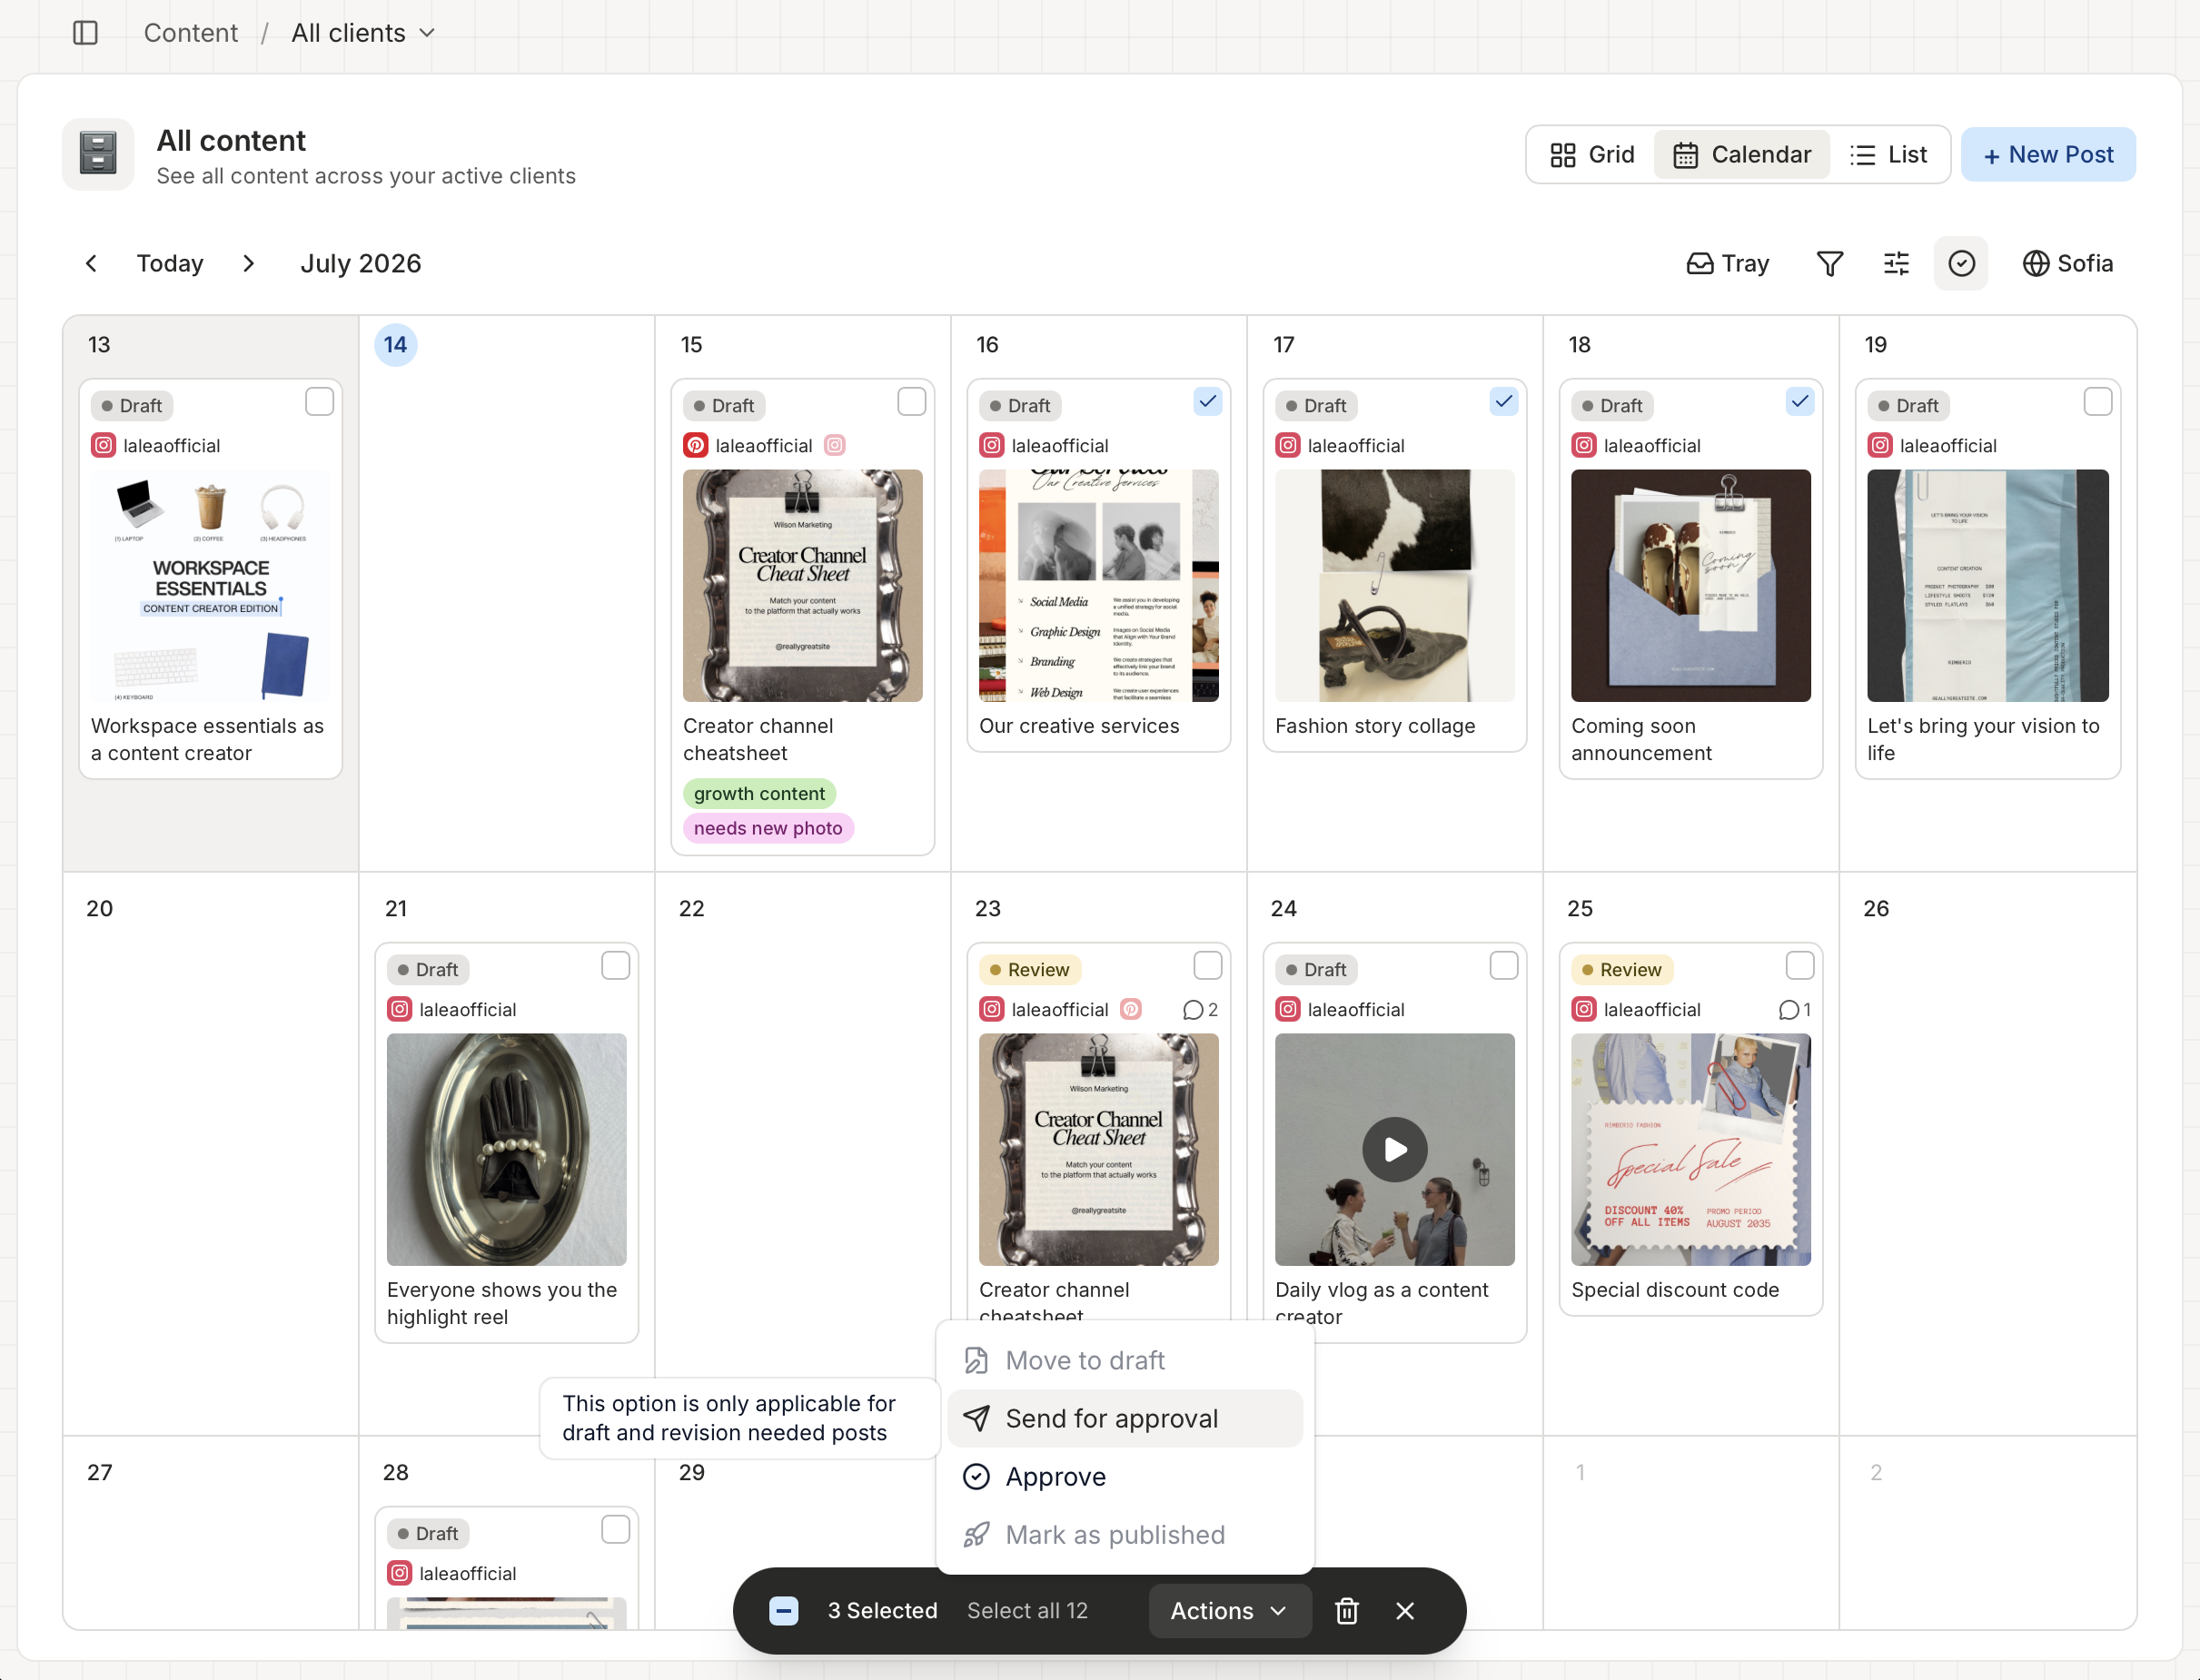
Actions that don't make sense for a given selection (like "Approve" on posts that aren't in Review) are greyed out. Click the x on the pill or use the toolbar icon to exit multi-select.
Narrowing down what you see with filters
Open the Filter icon in the toolbar to slide in the filter panel. Tick anything to narrow what you see - across every view.
Filter categories:
- Platform - Instagram, Facebook, TikTok, LinkedIn, X, etc.
- Type (calendar only) - Posts, Ideas, or Events.
- Status (calendar only) - Draft, Review needed, Revision needed, Approved, Scheduled, Published.
- Label - any of your workspace labels.
- Content type - Post, Video, or Story.
Customizing how the calendar looks
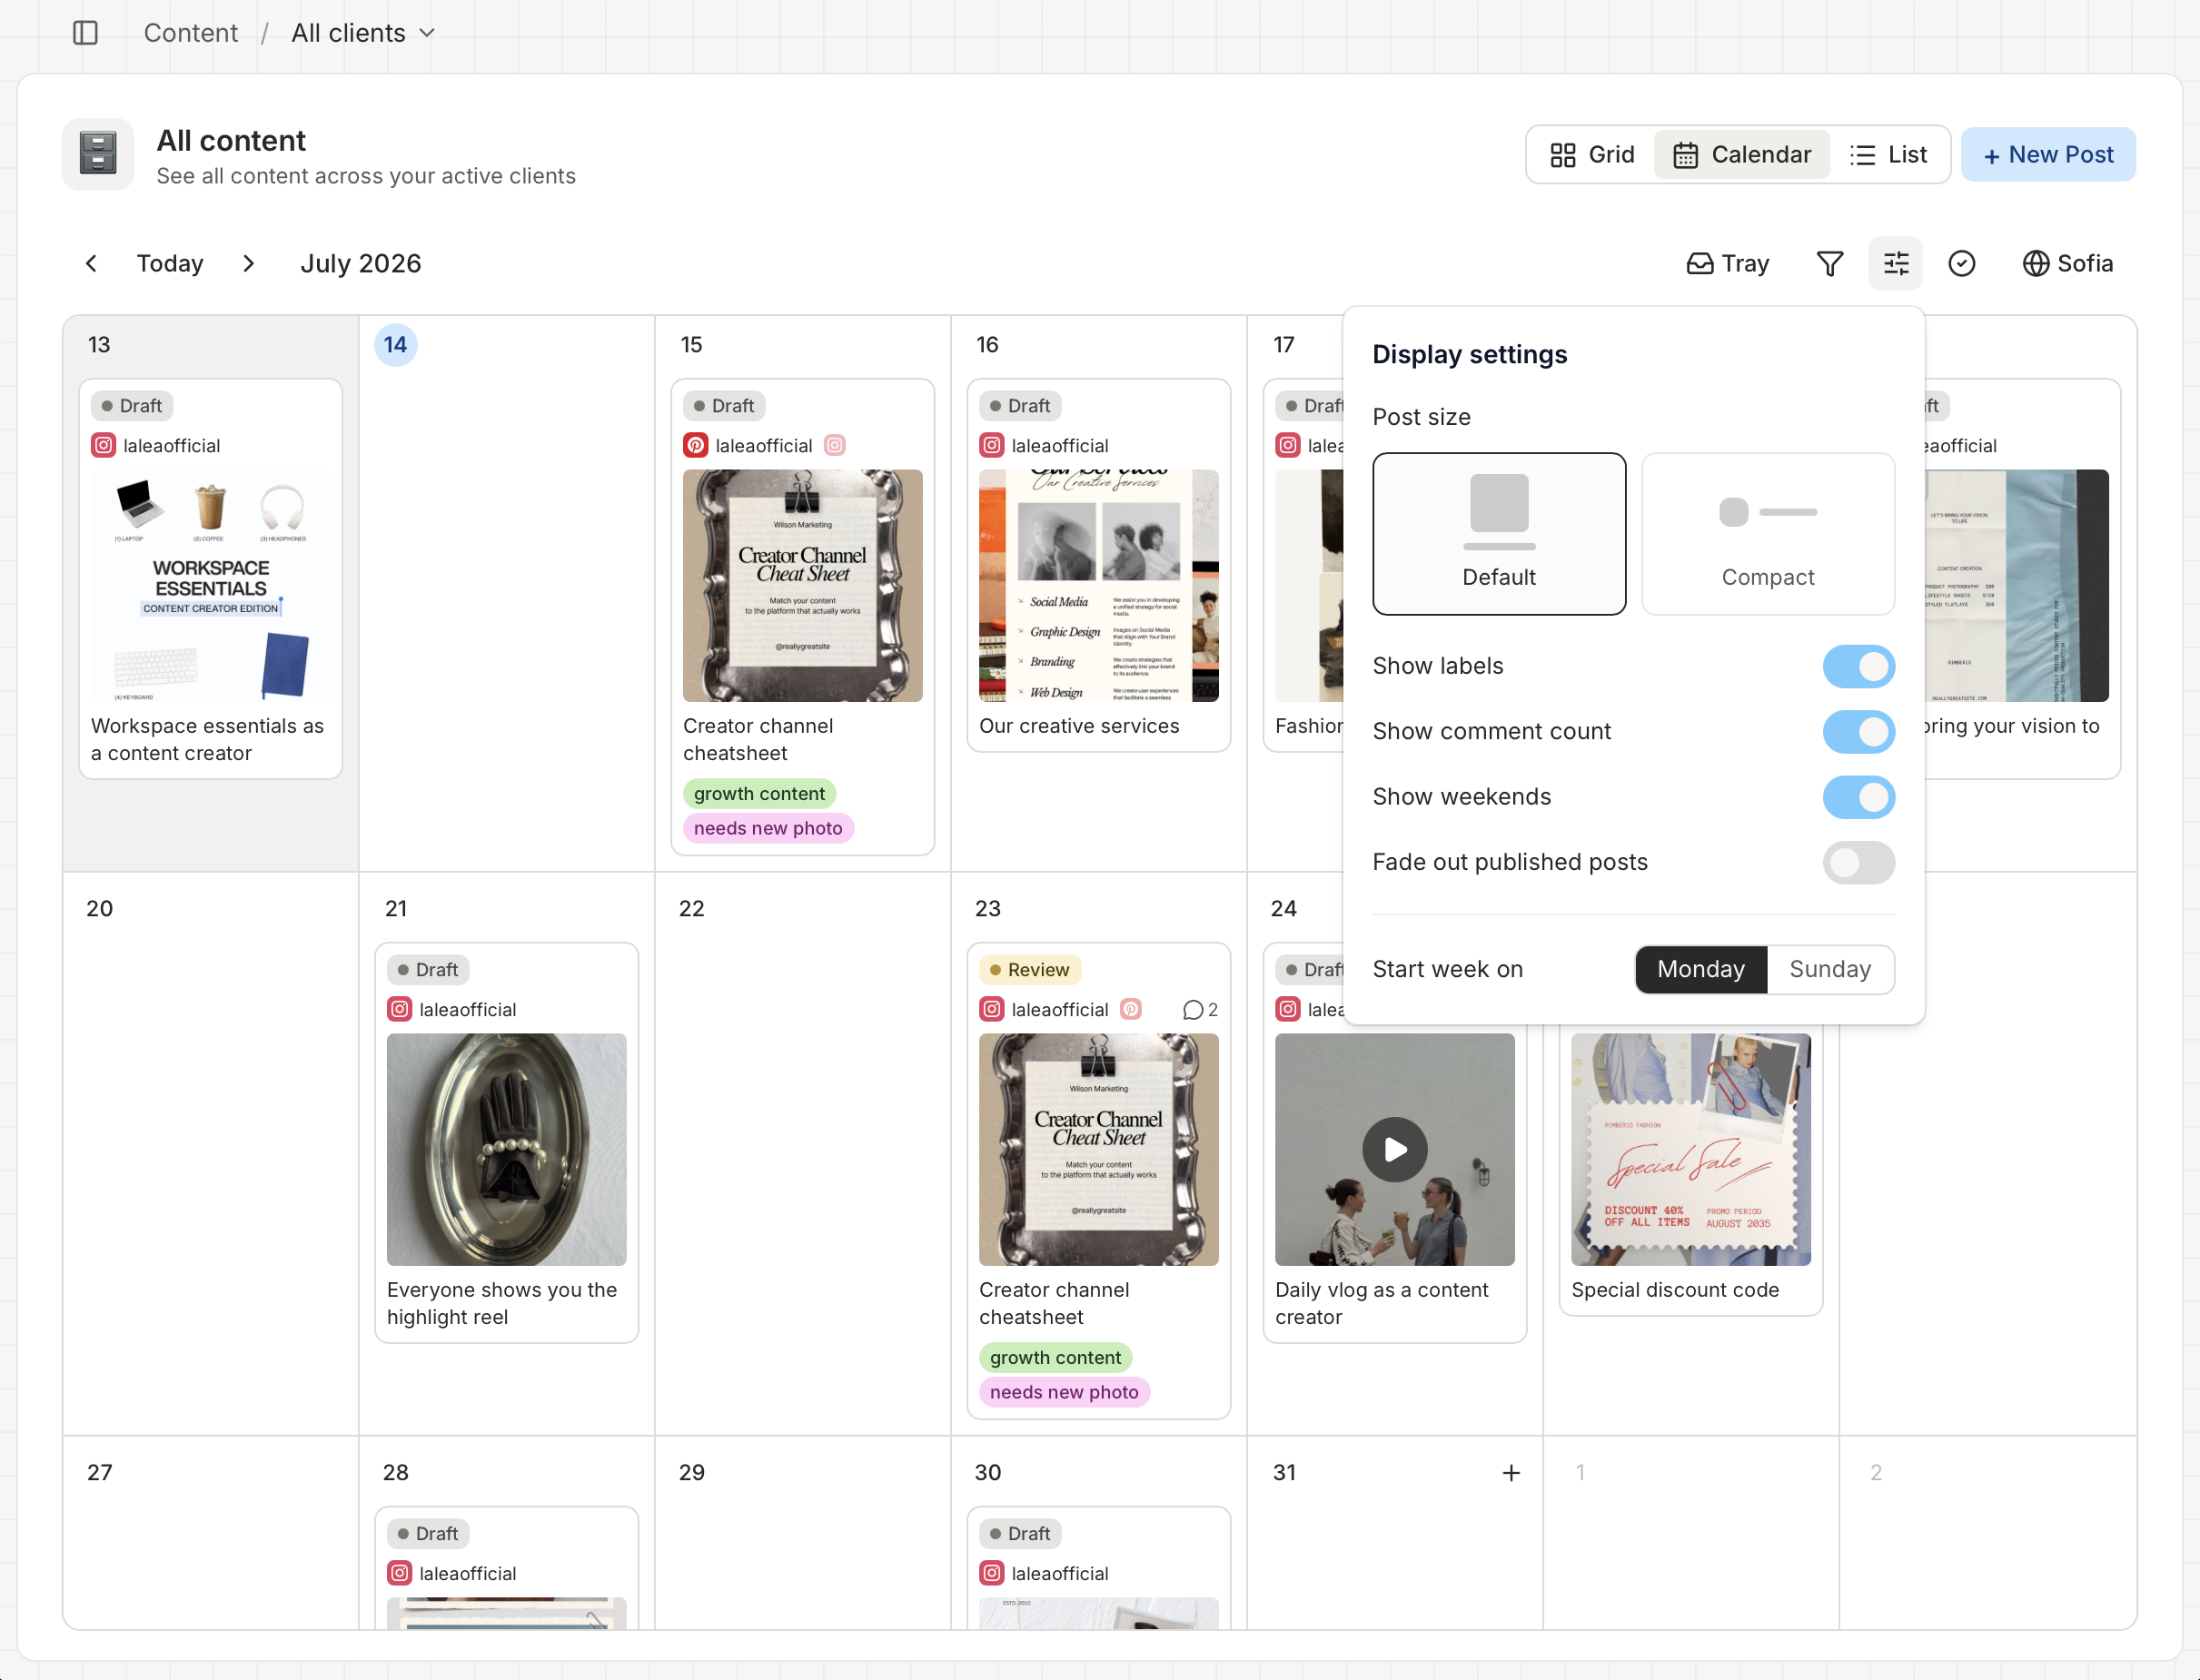
The Display settings icon (the sliders icon in the toolbar) opens a small popover for how the calendar looks. Everything here persists per user, so your calendar can look the way you like it without affecting anyone else.
- Post size - Default (media + a line of text) or Compact (a single line, more posts per day).
- Show labels - toggle the label chips on post cards.
- Show comment count - toggle the comment count on post cards.
- Show weekends - hide Saturday and Sunday columns if you're only posting weekdays.
- Fade out published posts - dim posts you've already marked published so your eye goes to what's next.
- Start week on - Monday or Sunday.
Viewing the calendar in a client's timezone
The timezone dropdown in the toolbar (next to the display settings icon) lets you see the calendar in a specific timezone. Handy when the client is in a different city than you are - flip the view to their timezone and the times on the calendar shift to match what they'd see.