
Organizing posts with labels
Labels are the tag system Say Less Office uses to help you sort posts however makes sense for your workflow. Campaign tags (Summer Launch, Q4 promo), status shorthand (waiting on approval, needs new photo), post types (carousel, reel idea) - anything you'd otherwise track in a spreadsheet column.
Labels live on the workspace, not on a single client, so the same label can be used across every client you have.
How to create a new label
Labels are managed inside your workspace settings.
- Open the account menu at the top-left of the sidebar and click Settings.
- Pick the Labels tab in the settings sidebar.
- Click New label in the top-right.
- Give it a name and pick a color.
- Hit save.
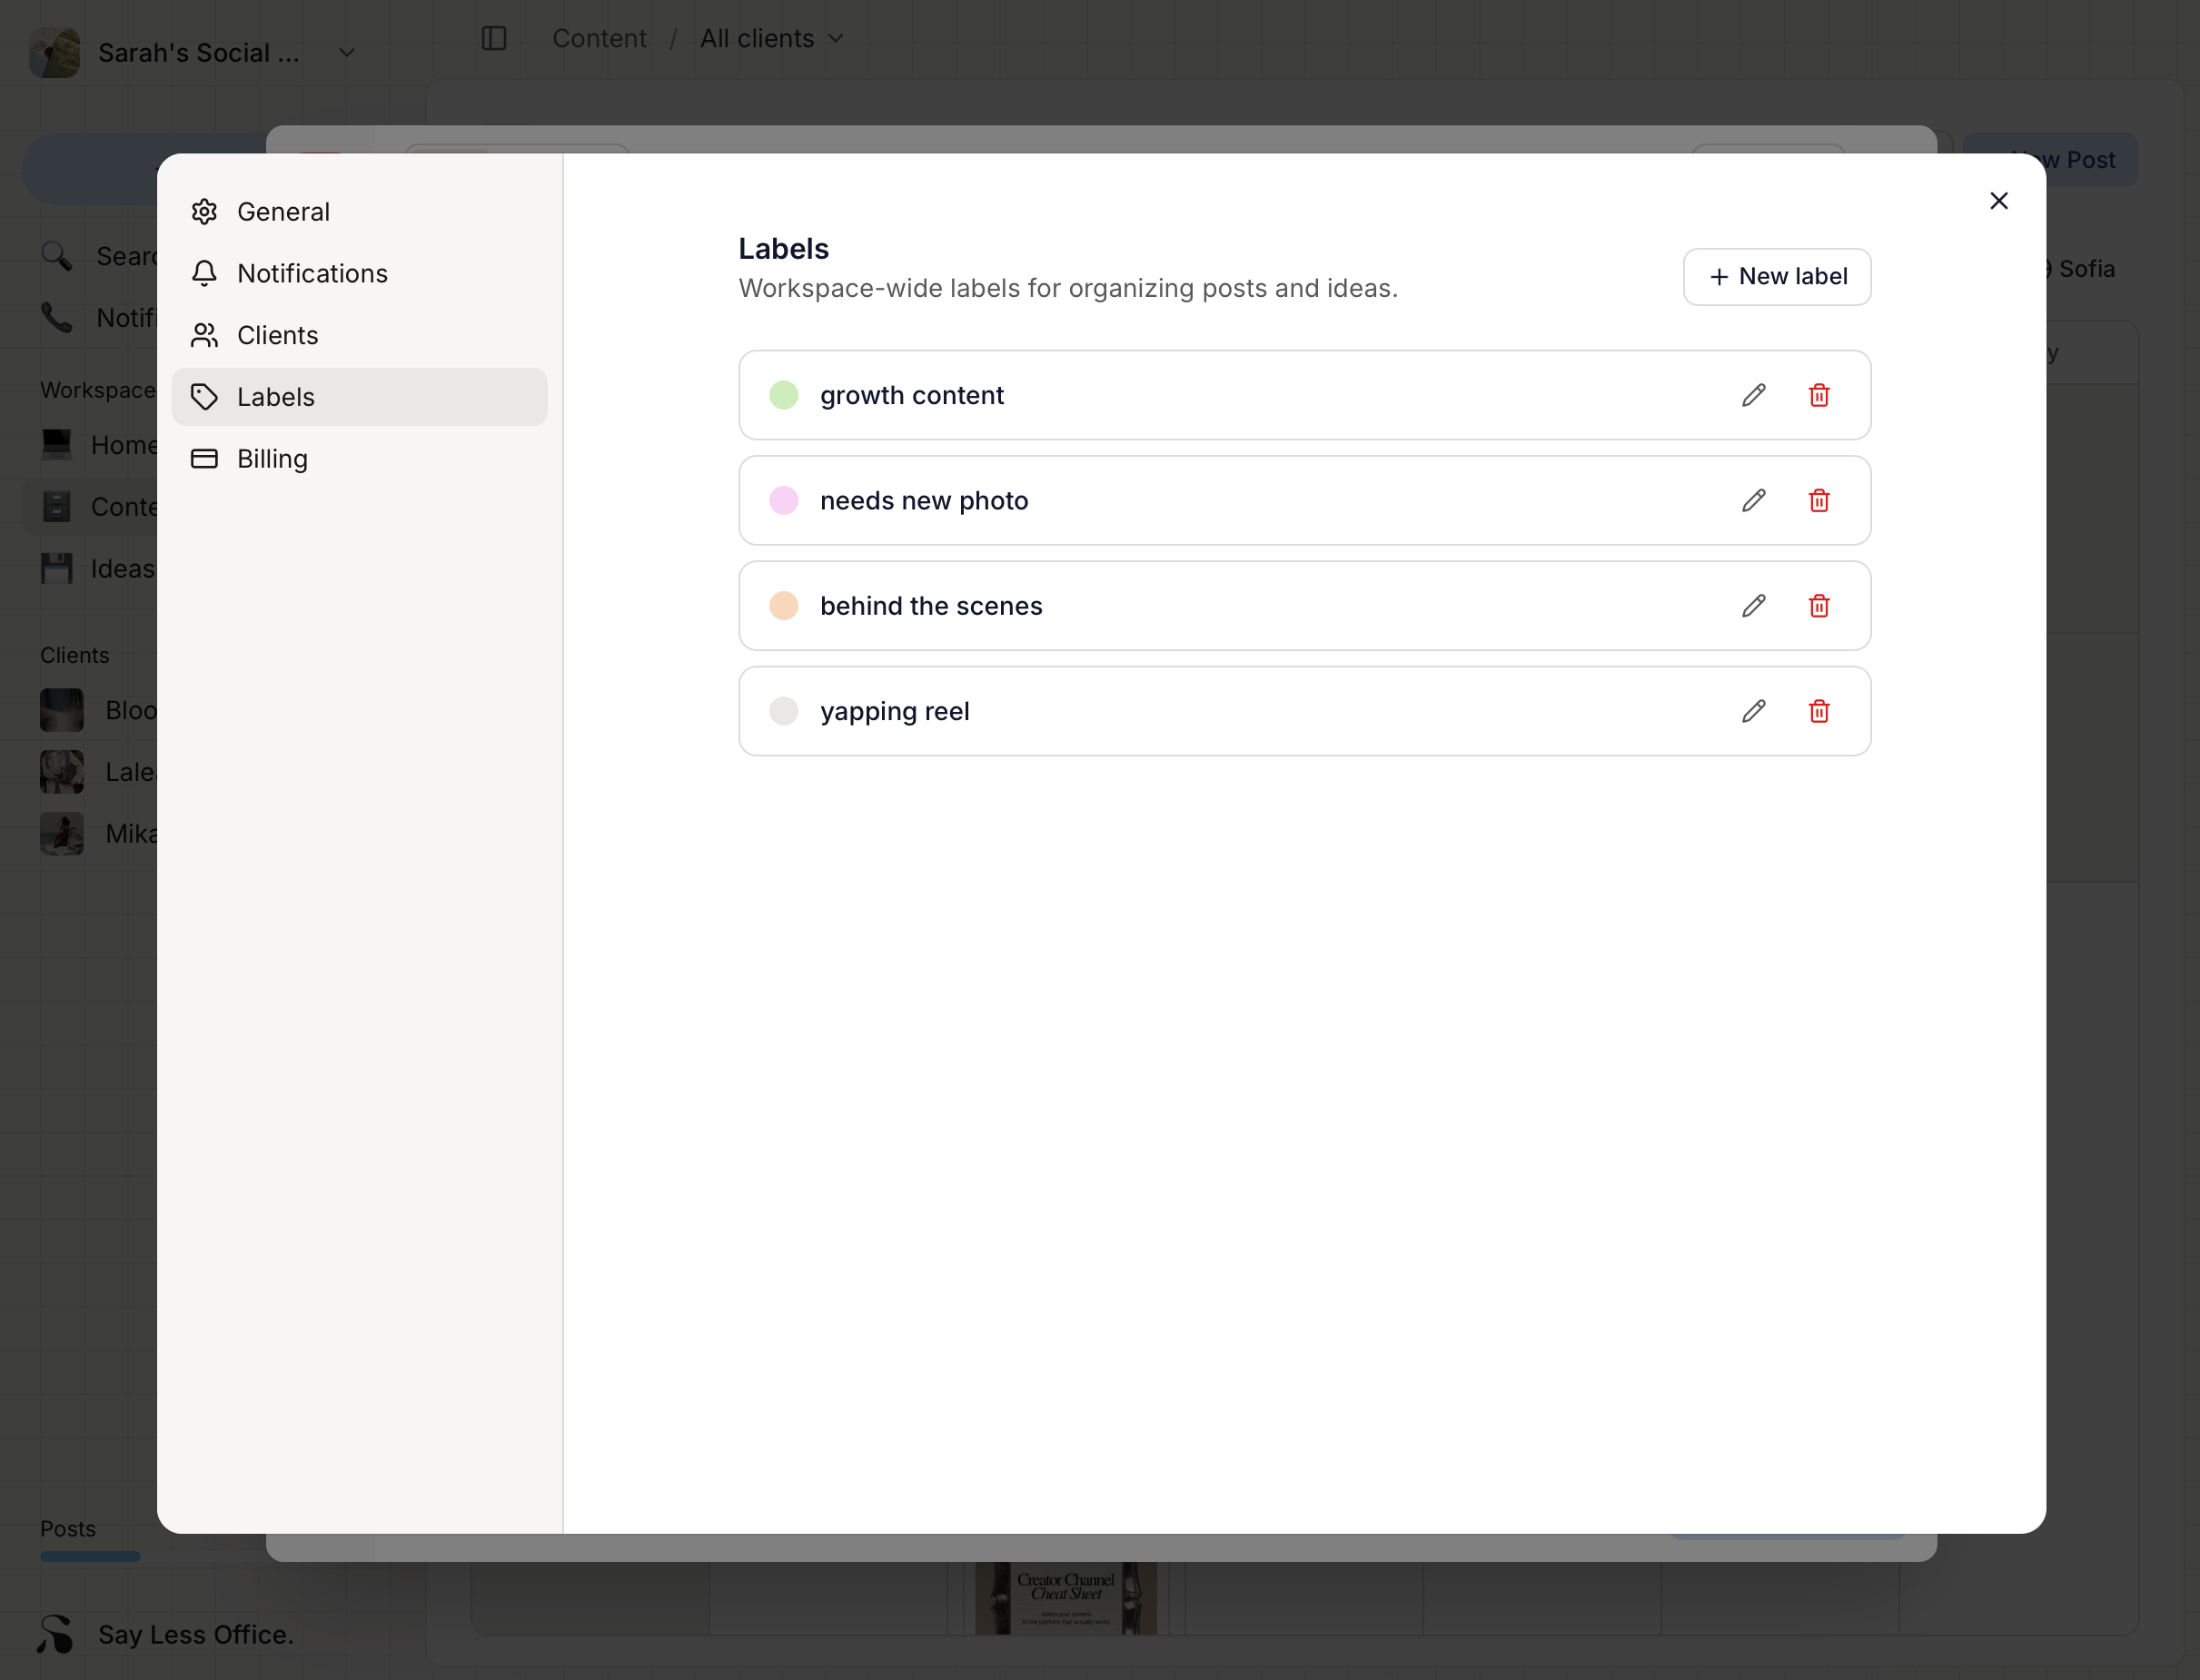
The label is now available on every post in your workspace.
How to edit or delete a label
In the same Labels tab:
- Click the pencil icon on a row to rename or recolor.
- Click the trash icon to delete. Confirm the delete - the label is removed from every post it was on, but the posts themselves stay put.
How to add a label to a post
Inside the composer, the Labels field sits with the other essentials (Status, Schedule, Media, Caption).
- Click the Labels row (says "Empty" when there aren't any yet).
- The label picker opens with a search field and every workspace label listed underneath, each with its color chip and a checkbox.
- Tick any label to add it. Un-tick to remove.
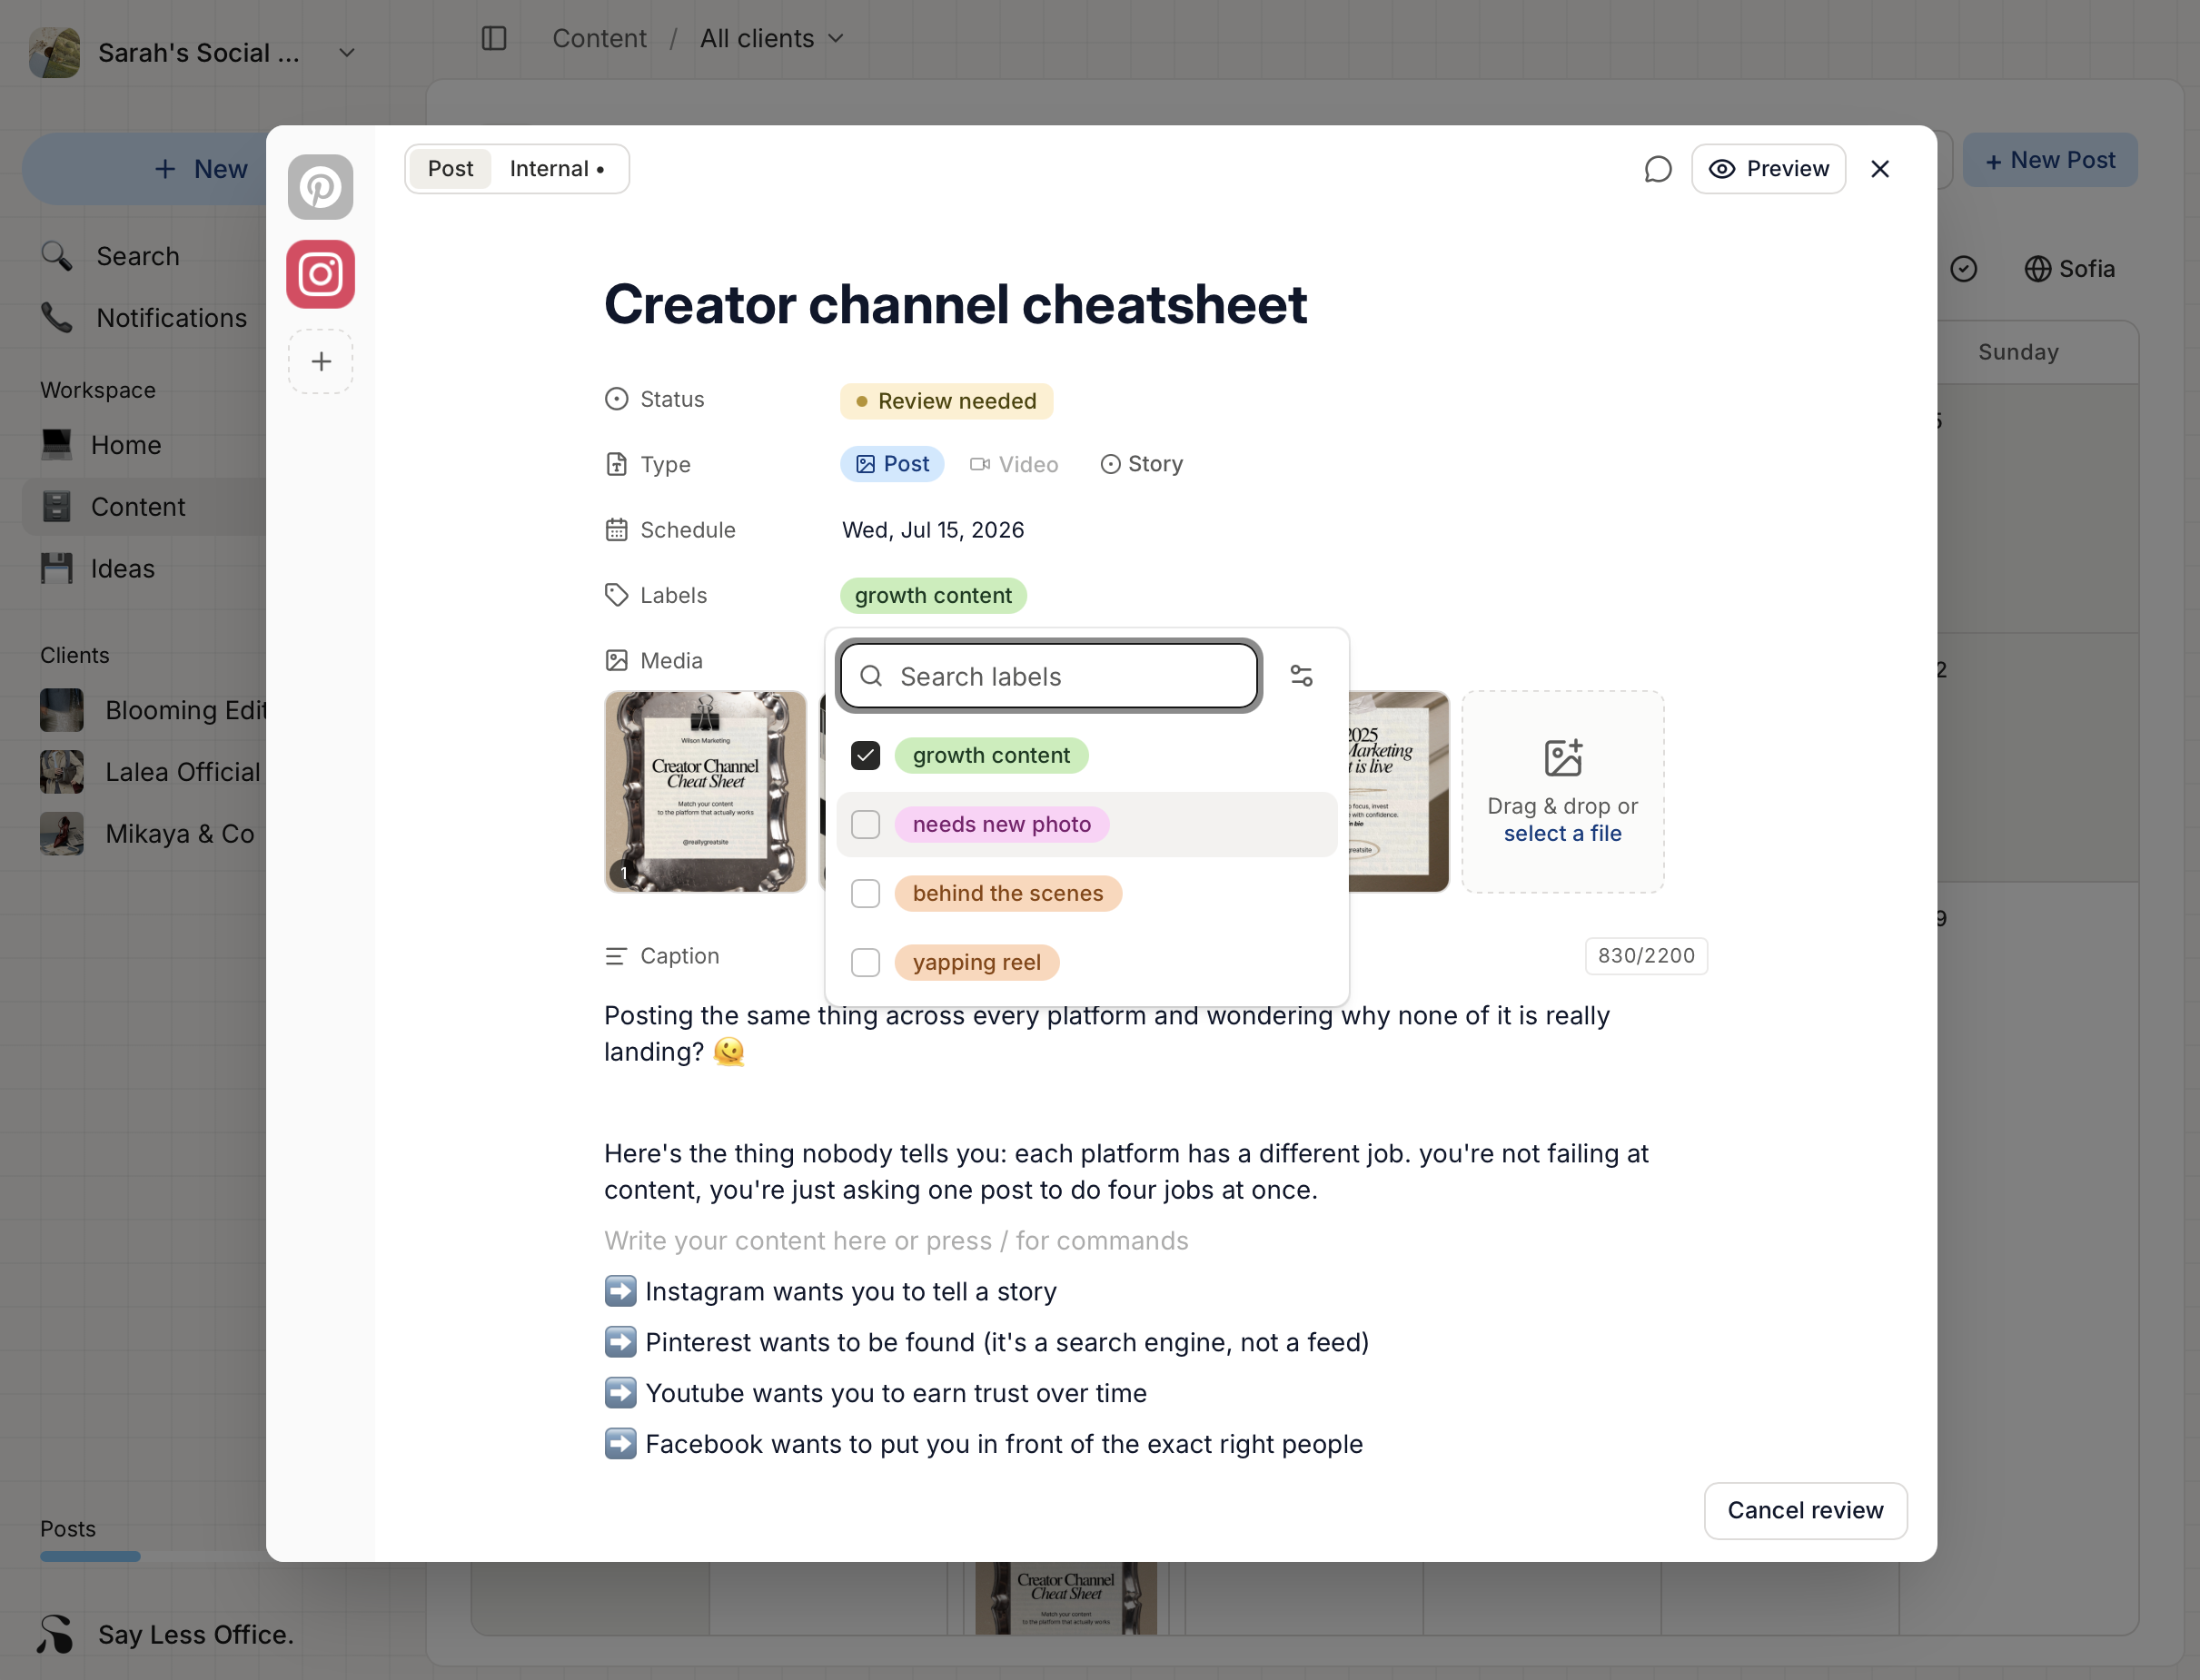
A post can have any number of labels on it. They show up as small colored chips wherever the post appears (calendar, list, grid).
How to filter posts by label
The content page has a filter panel that you can open from the toolbar. Under Labels, tick any labels you want to see. The calendar / list / grid narrows to posts that have at least one of the checked labels.
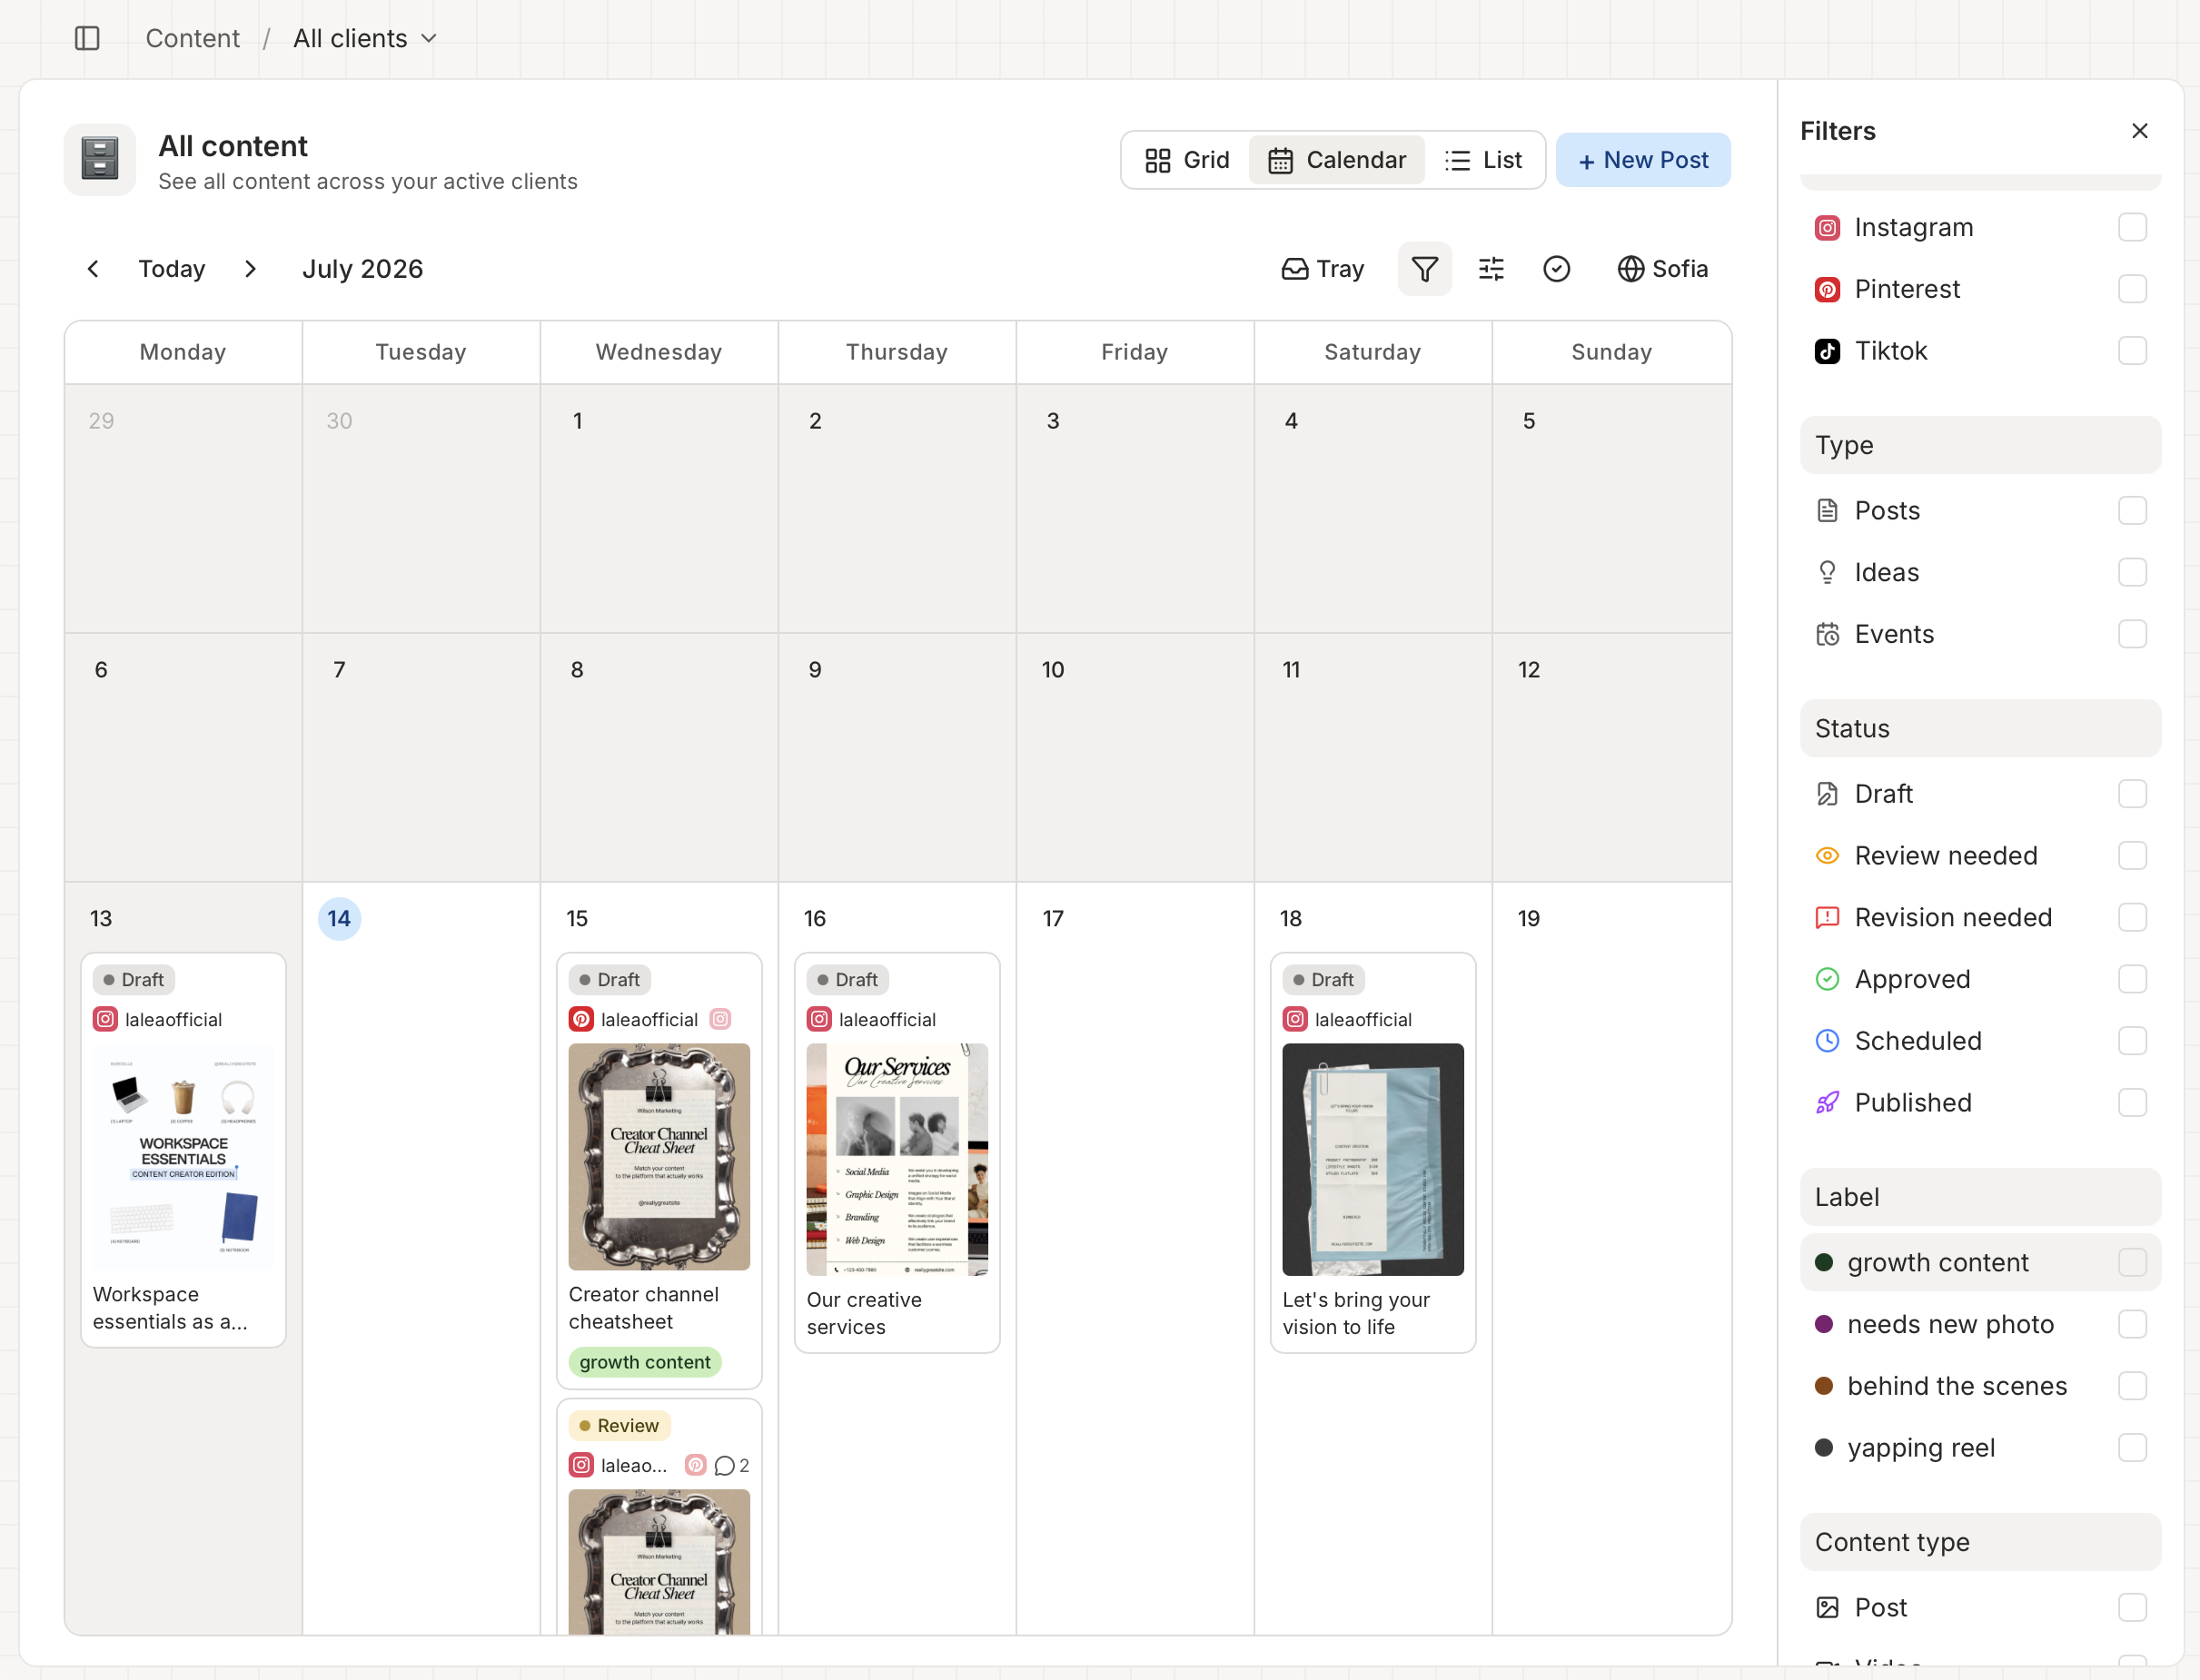
Untick to widen the filter, or clear all filters from the top of the panel to reset.