
Creating a new post
Everything you make in Say Less Office starts as a post: a caption, some media, an account it belongs to, and a schedule date if you know when it should go live. This article walks through the composer from empty to saved.
How to open the composer
Three ways in, use whichever is closer to what you're doing:
- The New Post button in the top-right of the content page (calendar, list, or grid view).
- Clicking a day on the calendar opens a fresh post pre-dated to that day.
- The + New button at the top of the sidebar - handy from anywhere in the workspace.
The essential fields on every post
The composer has one job: get enough into the post that it can be reviewed and eventually published. A post that's ready for a client generally has all of these filled in:
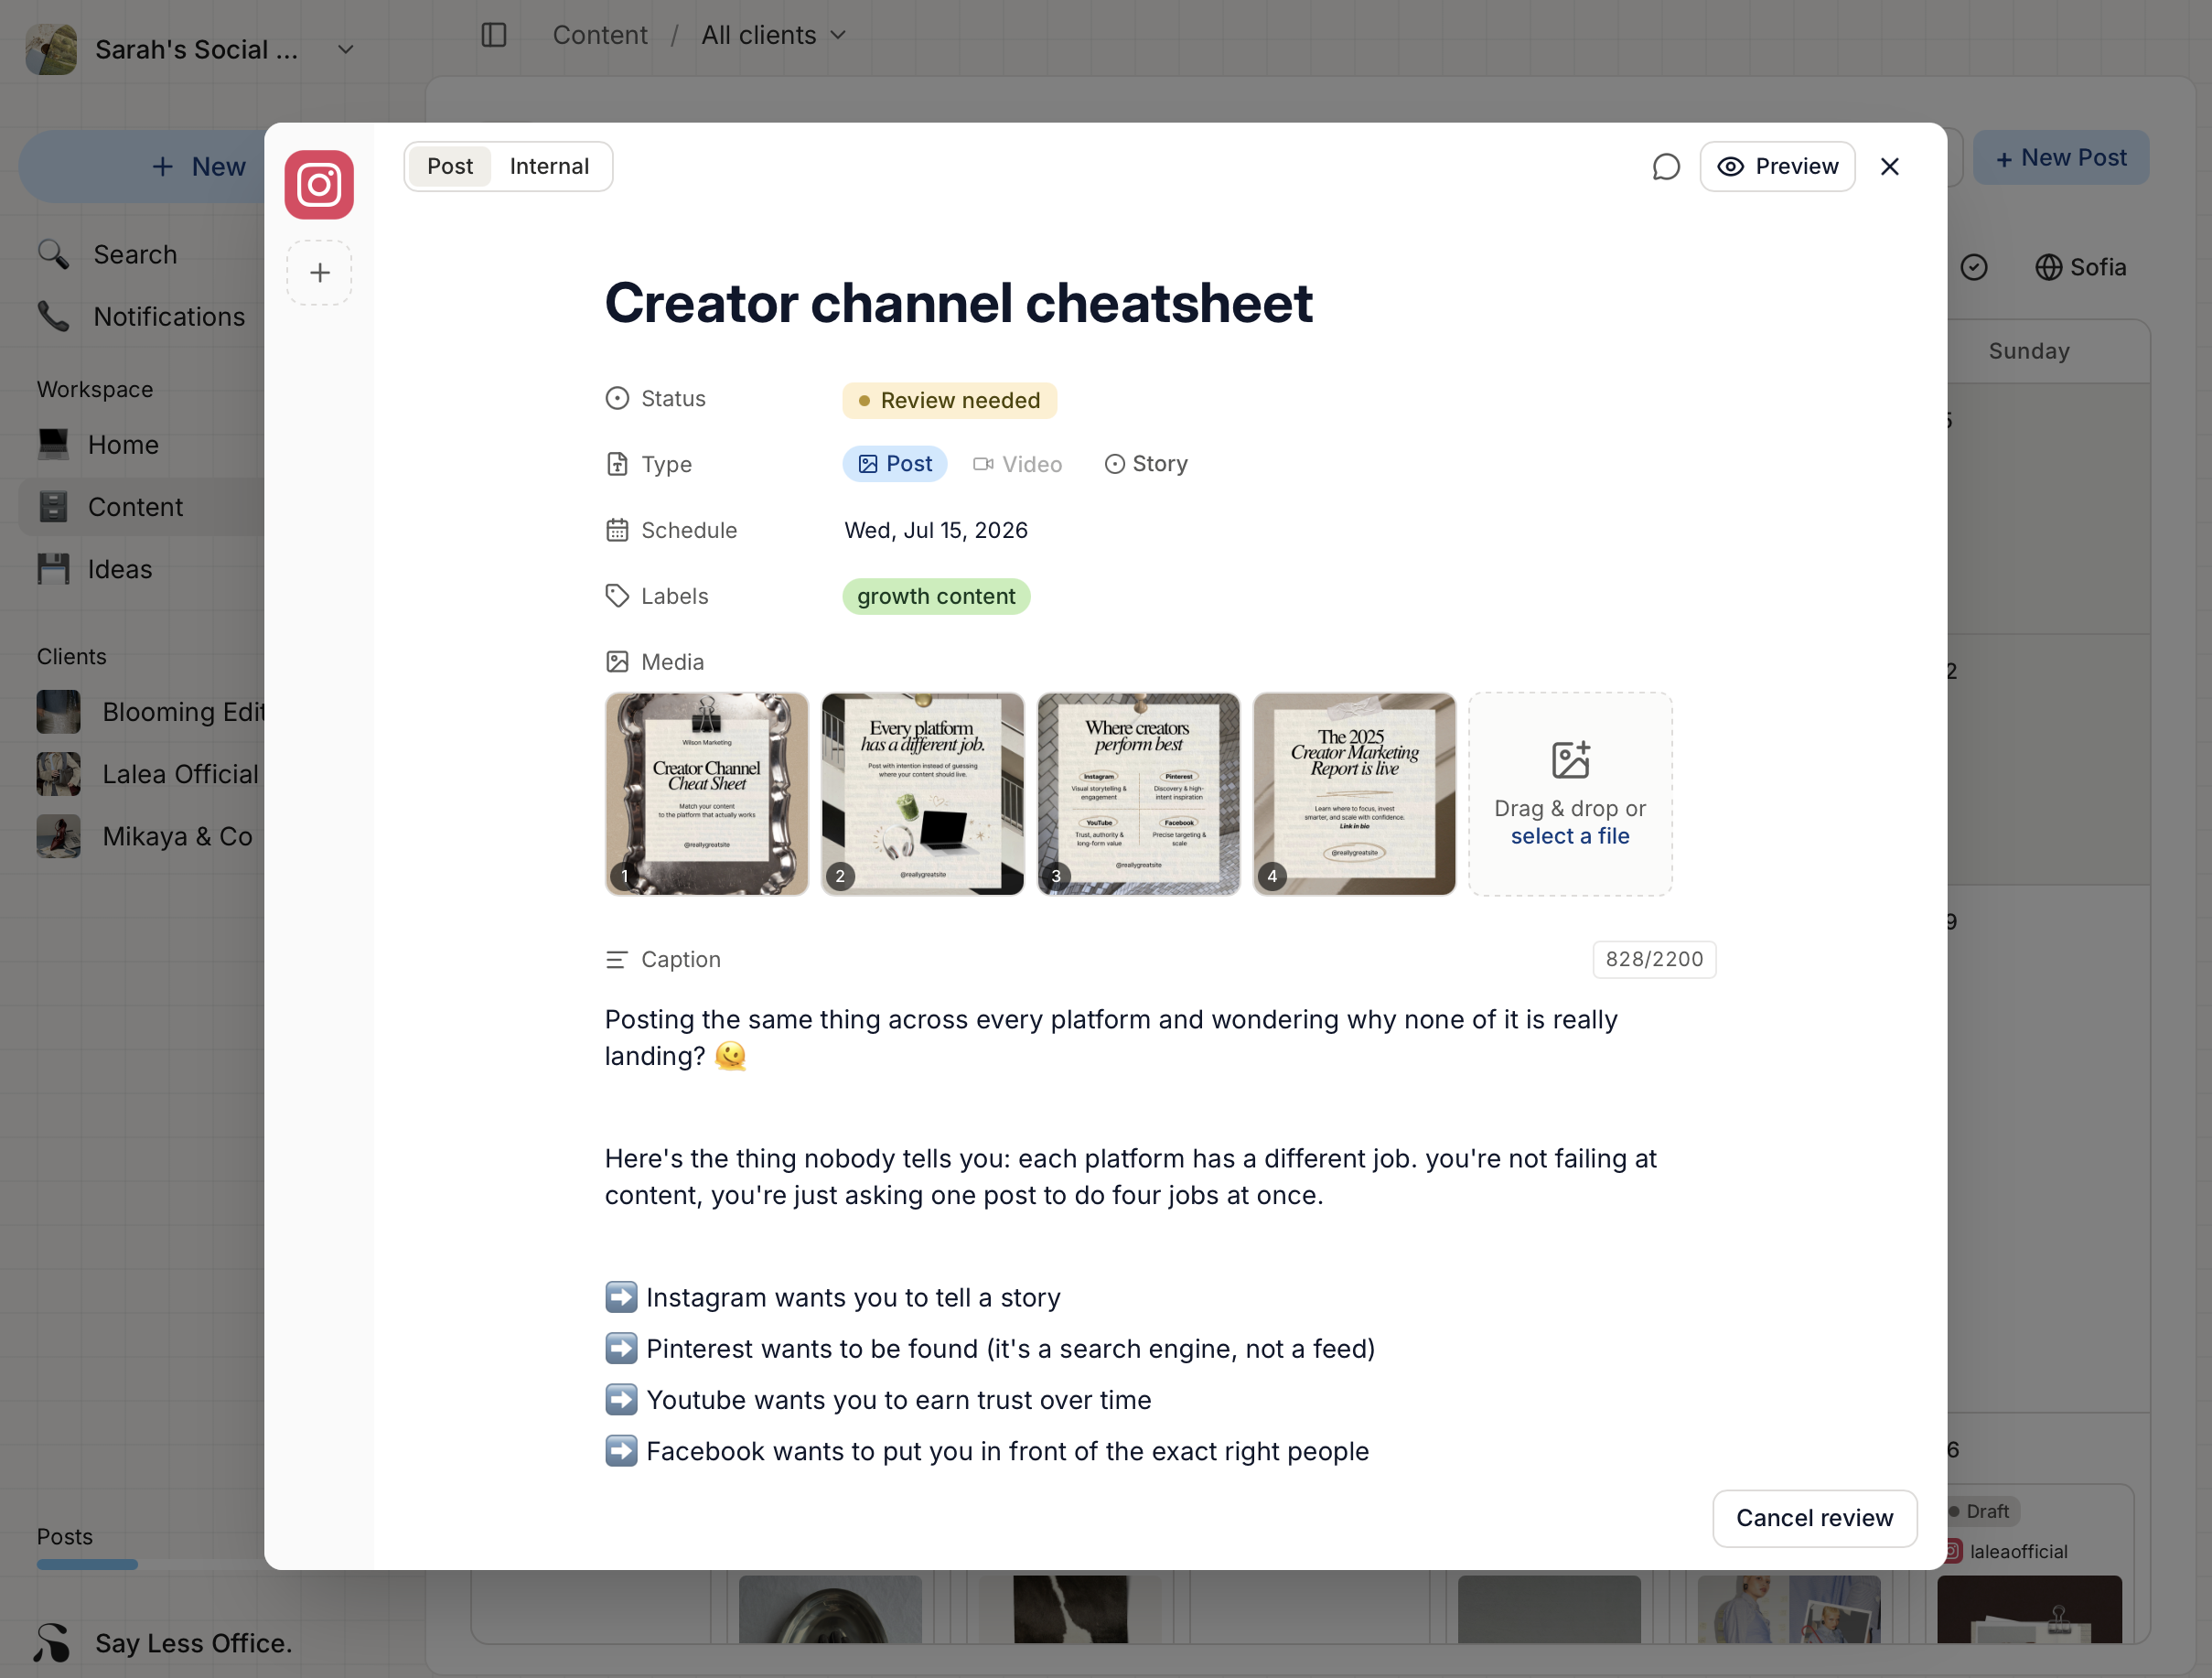
- Account - the channel this post belongs to. Pick it from the account rail on the left of the composer (the
+button). Once you pick one, the picker filters to that client's other channels only, so you can't accidentally mix accounts from different brands on the same post (see Creating post variants for different accounts if you want the same post adapted to more than one account). - Title - a short name for the post so you can spot it in the list and calendar.
- Type - Post, Video, or Story. Appears once you've picked an account, since different platforms support different types.
- Schedule - the date and time the post is meant to go live. Optional at draft stage, but usually filled in before you send it for approval.
- Labels - workspace tags for your own organization and filtering. Only you see them, never the client. See Organizing posts with labels.
- Media - drag and drop photos or videos onto the media box, or click select a file to upload from your machine.
- Caption - what you'd actually post. The caption editor has slash commands, snippets, and hashtags, all covered in Writing captions.
At the top of the composer there are two tabs, Post and Internal. Everything above is on the Post tab - the side your client will review. The Internal tab is a separate rich-text scratchpad on the same post that never reaches the client. See Adding internal notes to a post for what it can do.
Previewing how the post will look
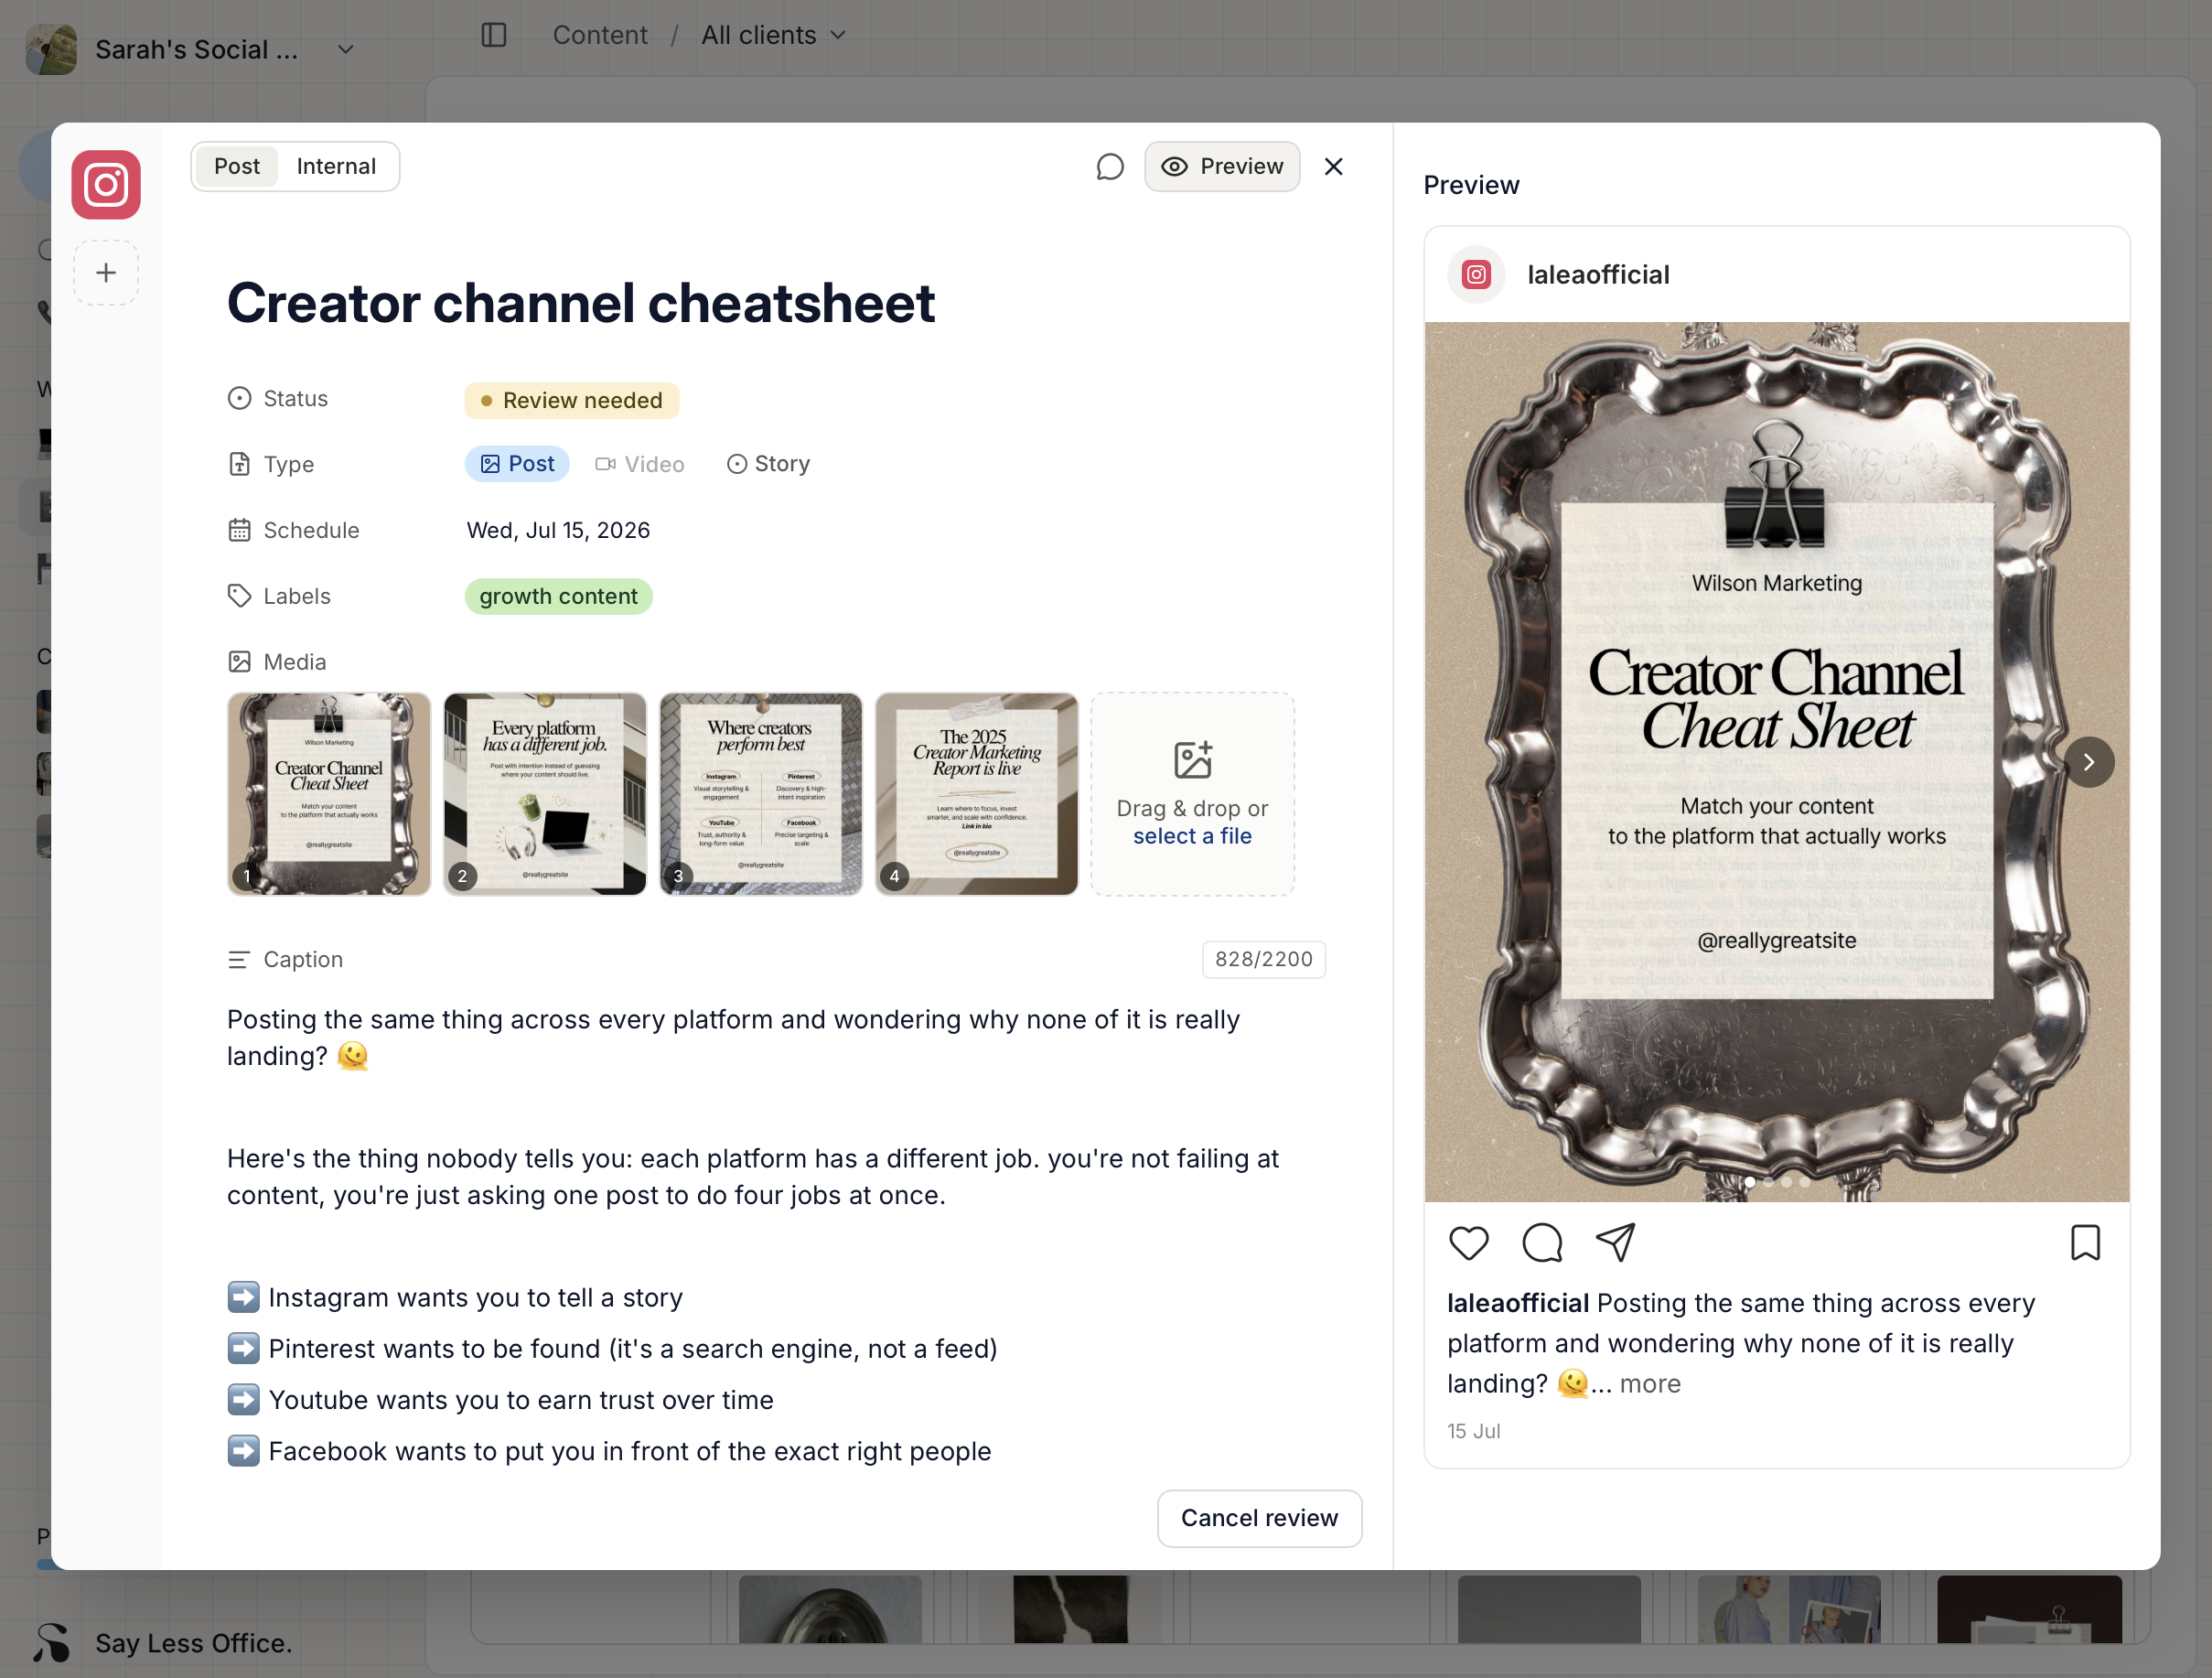
Click Preview in the top-right of the composer and a live rendering of the post appears alongside - Instagram post, Facebook feed card, TikTok video, whichever platform the account is on. As you edit the caption or swap the media, the preview updates on the fly.
Switching the Type between Post, Video, and Story swaps the preview frame to match.
Leaving a comment on a post
Sometimes you want to attach a note to the post itself - to give the client context before they review ("swap image 2 if you have a better shot") or to reply to a comment they've left.
Click Conversation in the top-right of the composer and the same thread the client sees opens on the side. Comments you add here go to the client by default.
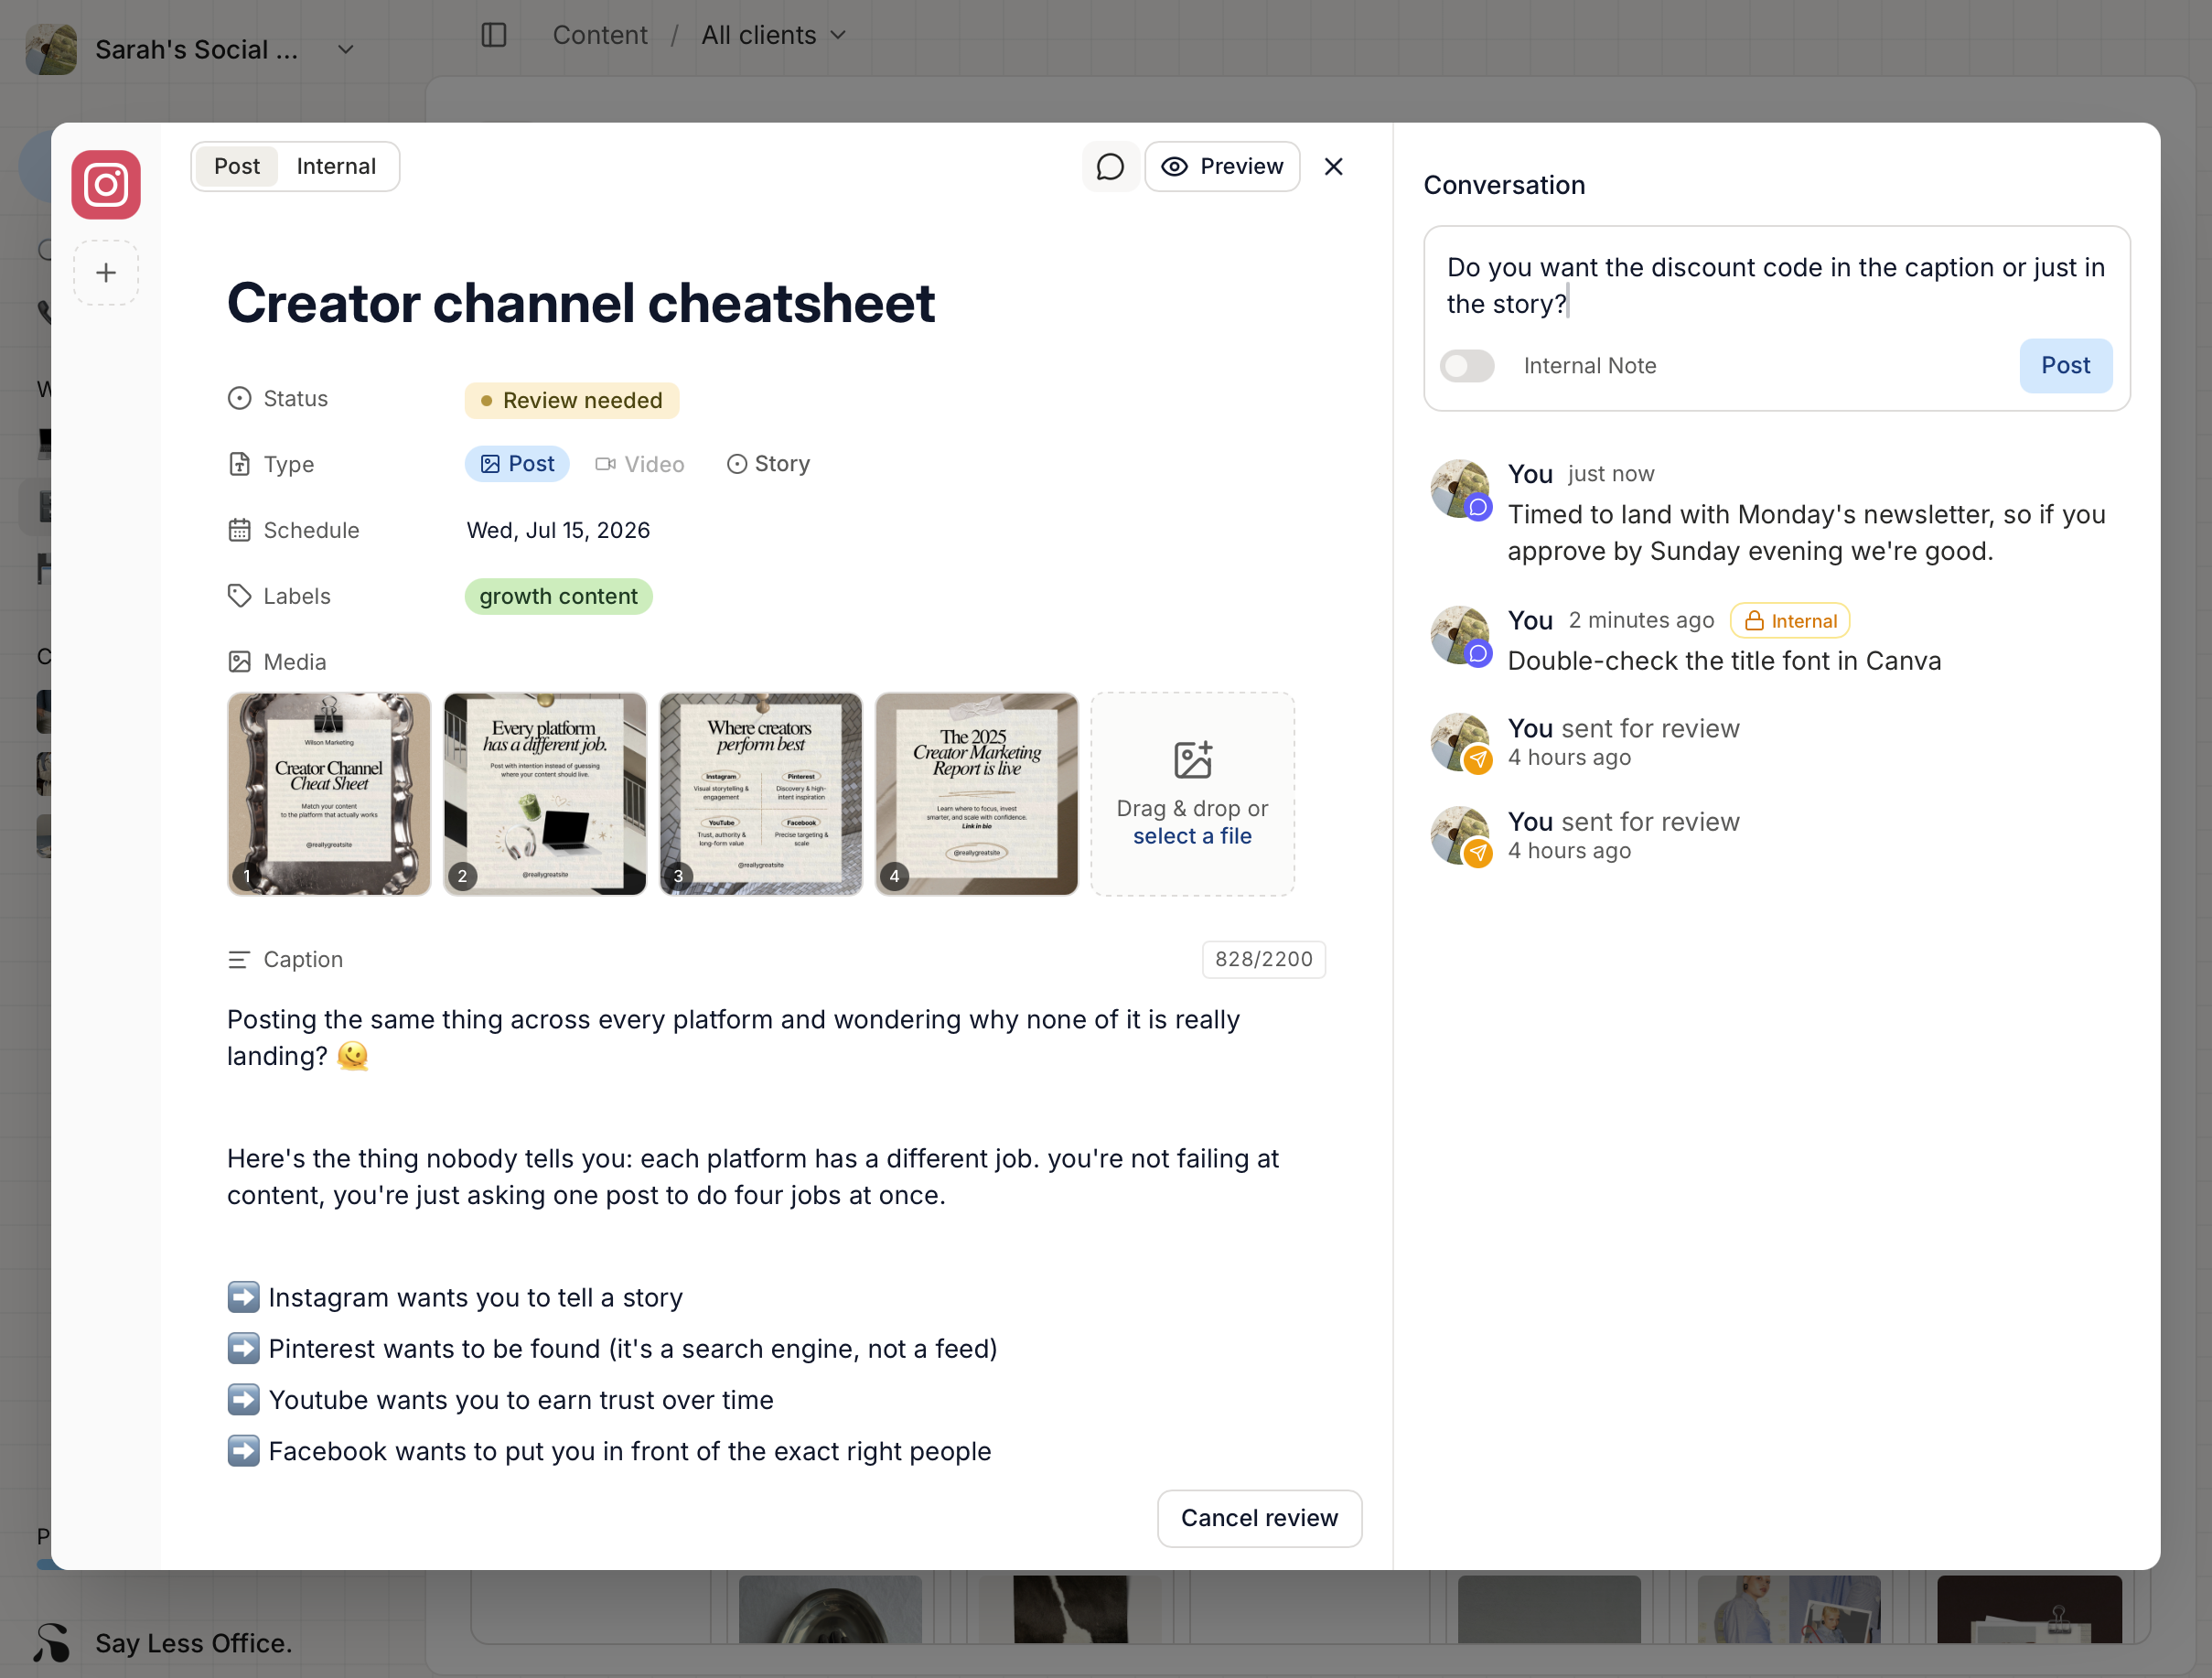
For longer notes that don't belong as comments at all, use the Internal tab instead - a rich-text scratchpad on every post that the client never sees.
Saving as a draft or sending for review
Two paths out of the composer, one button each in the footer bar:
- Save parks the post in Draft. It lives in your workspace only - the client doesn't see it.
- Send for approval flips it straight to Review needed and hands it to your client. See Sending a post to your client for review for what your client sees.